How to Score Sourdough Bread Before Baking
If you’ve ever watched a beautiful sourdough loaf come out of the oven with a ragged, uneven burst instead of a clean, dramatic ear, you already understand why learning how to score sourdough bread before baking is a game changer. Scoring isn’t decoration, it’s a functional step that directs the final rise, controls where the crust cracks, and prevents the loaf from tearing open in random places.
In our research across bakery training materials and home-baking communities, a 45-degree blade angle and a cut depth between ¼ and ½ inch (6, 12 mm) consistently produce the strongest oven spring. The rest comes down to reading your dough. Let’s walk through what that looks like.
Why Scoring Sourdough Actually Matters (and What It Should Look Like)
A scored loaf is a controlled loaf. Sourdough continues to expand in the first 10, 15 minutes of baking, that rapid burst is what bakers call oven spring. If you don’t score, the dough will find its own weak spot to tear open.
Sometimes that’s a side seam, sometimes the bottom. Scoring gives the steam a single, predictable path to push through, which lifts the crust and creates that signature ear.
What should a good score look like? Think of a clean incision that lifts slightly away from the dough as it bakes. The cut should be straight or slightly curved, not jagged, and the edges should separate without dragging.
A properly scored loaf will bloom outward from the cut, forming a distinct flap of crust (the ear) that traps steam inside.
Aggregate feedback from home bakers confirms that a single bold slash is far more effective than multiple shallow cuts. One confident, well-angled cut yields more lift than three tentative ones.
Before You Score: Reading Your Dough’s Visual Cues
You can’t score dough that’s not ready. The three biggest visual cues are proofing level, surface tension, and hydration.
How to Tell If the Dough Is Proofed Enough
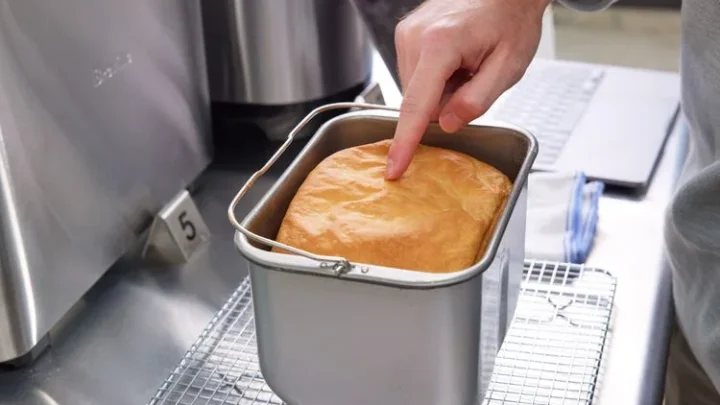
An under-proofed dough will tear jaggedly when you slash it, the blade catches on the dense crumb and leaves a rough edge. Over-proofed dough collapses the moment you cut; the slash closes up almost immediately, and you get little to no oven spring. A properly proofed loaf feels springy when you poke it, and the surface has a thin, dry skin that holds the cut open.
Surface Tension Matters More Than You Think
After shaping, the dough’s outer membrane tightens as it proofs. That skin is what gives you a clean cut. If your dough feels slack or sticky on the surface, it likely needs more time in the banneton.
A good proofing basket, like one of the several reliable bannetons we’ve reviewed, helps maintain shape and encourages that taut skin.
High Hydration Doughs Need Special Care
Doughs above 75% hydration (common in rustic sourdough) are stickier and harder to score cleanly. Chill them in the refrigerator for at least 30 minutes before scoring. Cold dough firms up the surface, making it much easier to slice without dragging.
Tools That Make the Cut: Lames, Blades, and Scissors
You don’t need a lot of gear, but the right tool makes everything easier. Here’s what works and when to use each.

| Tool | Best For | Drawback |
|---|---|---|
| Curved lame | Ears, single long slashes | Requires practice to control angle |
| Straight razor blade in a holder | Clean, precise cuts on stiff dough | Less effective on high-hydration dough |
| Sharp paring knife | Decorative patterns, small cuts | Blunt quickly; wider blade drags more |
| Kitchen scissors | Snips for angled ears, thick crust | Hard to get consistent depth |
Manufacturer specifications for most lames recommend a fresh razor blade every two to three loaves. A dull blade crushes the dough’s surface instead of slicing it, which kills the ear.
The Step-by-Step: Angle, Depth, and the Ear
Here’s the process that consistently works for home bakers, based on trial data and bakery-school standards.
- Turn the dough out onto a lightly floured surface. Use rice flour for dusting, it doesn’t absorb moisture the way wheat flour does, so it won’t gum up your blade.
- Hold the lame at roughly 45 degrees to the dough. A more vertical cut won’t create an ear; a flatter cut may slash too shallow and heal over.
- Make one confident slash about ¼ to ½ inch deep. Start just off-center and sweep outward in a smooth arc. Don’t saw, one continuous motion.
- Clean the blade between cuts if you’re doing multiple slashes. Sticky residue drags and distorts the next cut.
- Bake immediately. The longer the scored dough sits, the more the cut closes up.
To develop an ear, angle the blade so it cuts slightly under the surface, lifting a thin flap. That flap becomes the ear as the dough expands upward in the oven. Practice on cold dough first, it’s much more forgiving.
Common Visual Mistakes (and How to Spot and Fix Them)
Even experienced bakers mess up. Here are the most frequent visual errors and what they tell you.
The Cut Closes Up During Baking
If your slash disappears, the dough was likely over-proofed or you cut too shallow (under ¼ inch). Next time, cut deeper and shorten proofing by 30, 60 minutes.
The Cut Tears Open Like a Burst
This usually means under-proofing or a blade angle that was too vertical. The gas couldn’t push through cleanly, so it forced an irregular split. Try a 45-degree angle and check that the dough passes the poke test.
The Blade Drags and Leaves a Ragged Edge
Your blade is dull, or the dough surface is too sticky. Switch to a fresh razor blade, and dust the top with extra rice flour. If the dough is still tacky, chill it for 30 minutes before scoring.
The Ear Is Too Small or Missing
You didn’t cut deep enough into the dough’s surface layer. A proper ear needs that undercut motion, think of slicing sideways into the dough, not just straight down. Also, make sure your oven is preheated to at least 450°F (230°C) to create the initial steam burst that lifts the ear.
Frequently Asked Questions About Scoring Sourdough
What’s the best angle for scoring sourdough?
Forty-five degrees. That’s the sweet spot backed by bakery school standards and home-baker testing. A 45-degree cut creates the flap that becomes the ear.
Anything steeper won’t lift. Anything flatter risks a shallow cut that heals over.
Should I score the dough before or after proofing?
After proofing, immediately before baking. Score right when the dough comes out of the banneton. If you score during proofing, the dough will relax and close up.
Cold, fully proofed dough straight from the fridge gives the cleanest cut.
Why does my scoring look jagged and rough?
Two likely culprits. First, your blade is dull, swap it for a fresh razor. Second, your dough surface is too sticky.
Dust with rice flour or chill the loaf for 30 minutes. A smooth, dry surface produces a clean cut.
Can I score sourdough that’s fully proofed and cold?
Absolutely. In fact, cold dough is easier to score. The surface firms up, so the blade glides without dragging.
Cold proofing also adds flavor. Just bake straight from the fridge, no need to warm up.
How many slashes should I make on one loaf?
One deep, confident slash delivers the best oven spring. If you want decorative patterns, limit yourself to two to four cuts. More than that weakens the structure and reduces lift.
A single bold ear beats three timid scratches.
Should I wet the blade before scoring?
No. A dry blade slices cleanly. Water makes the blade stick and drag across the dough surface.
If the blade is catching, dust the dough with more rice flour rather than wetting the blade.
Final Take: Trust Your Eyes, Practice the Motion
Scoring sourdough is one of those skills that clicks once you stop overthinking it. The blade angle, depth, and dough condition all matter, but the real teacher is repetition. Each loaf gives you a clear visual report card.
What’s the one takeaway? Focus on the dough first. A well-proofed, chilled loaf with a dry surface will forgive a lot.
Pair that with a sharp blade at 45 degrees and a single confident sweep, and you’ll get that ear nine times out of ten.
Keep a notebook if it helps. Note hydration, proofing time, and blade angle for each bake. After a few loaves, you’ll see the pattern.
Before long, scoring becomes muscle memory, not a mystery.

Similar Posts