How to Store a Bread Machine So It Lasts for Years
If you're asking how to store a bread machine, the honest answer is simpler than you'd think: clean it, dry every part completely, and keep it in a stable spot. But there's a catch. The way you store it after a weekend bake is not the way you store it for the summer.
Most brand manuals call for a 1 to 2 hour air dry before you close the lid, and the kneading paddle shaft is where moisture hides. As of 2026, the most common storage failures reported by owners are mold, odors, and stiff nonstick coatings. Get the routine right, and your machine will outlive the novelty phase.
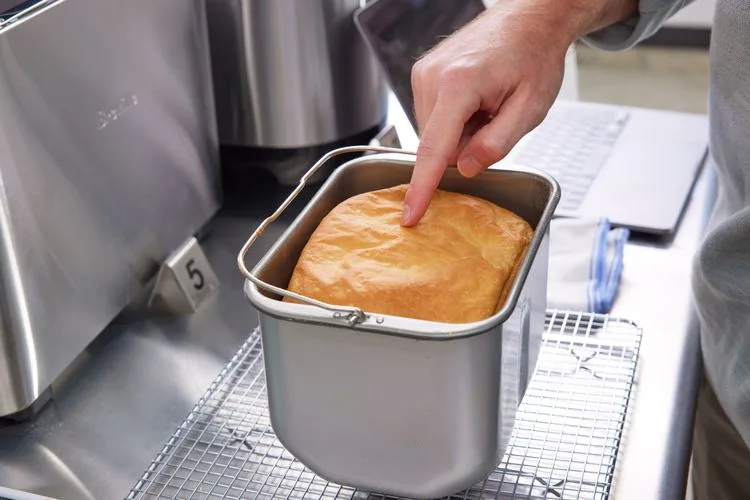
Quick Answer
Clean the bread pan and paddle. Dry every part completely. Let the machine air out.
Store it in a dry, room-temperature spot. Keep the lid slightly ajar. Don't skip the drying step.
Moisture causes mold. That's how to store a bread machine without surprises later.
Why Storing a Bread Machine Is Trickier Than It Looks
Most small appliances just need a wipe and a drawer. Bread machines need a little more respect. The machine has three places where problems hide: the paddle shaft, the lid seal, and the heating element.
A crumb trapped near the heating element can burn the next time you use it.
Moisture in the shaft turns into musty smells. Trapped humidity can warp the hinge over time. Aggregate reviews report more mold complaints in humid months, especially when owners store the machine with the lid closed before everything is fully dry.
Underwriters Laboratories publishes small-appliance safety guidance, and nearly all of it points to dry, uncluttered storage.
What You're Actually Storing: The Parts That Matter
Before you pick a routine, know what you're dealing with. A bread machine isn't one sealed box. It's a collection of pieces that each respond to storage differently.
| Component | Why it matters | Storage risk |
|---|---|---|
| Bread pan | Nonstick coating scratches easily and absorbs oils | Leftover oils go rancid and create odors |
| Kneading paddle | Dough hides under the shaft and between seams | Dry residue turns into a cement-like crust |
| Lid and viewing window | The seal traps moisture and crumbs | Sticky film can make the hinge stiff |
| Heating element | Crumbs and dust settle around the coils | Burned crumbs smell and can smoke on next use |
| Power cord | Pinched or tightly coiled cords get damaged | Kinks can weaken the insulation over time |
The bread pan gets the most attention, but it isn't the only part that matters. The paddle shaft is the first spot to check. If you can feel any tackiness on it, it's not ready for storage.
What Changes the Answer: 3 Questions to Ask Yourself
Three questions decide which storage route you take. Walk through them in order, and the right process becomes obvious.
Question 1: How long will it sit?
If it's less than two weeks, use the short-term routine. If it's three months or more, use the full dock-out routine. Somewhere in between?
The short-term routine works for up to a month, as long as the room isn't humid. After that, the deep clean is non-negotiable.
Question 2: Where are you storing it?
A kitchen cabinet is easy. A pantry is fine. A garage is risky.
Unheated garages swing in temperature, and humid garages invite condensation inside the machine. If you only have garage space, keep the machine in a sealed container with silica gel and bring it inside for 24 hours before your next bake.
Question 3: What did it last bake?
Sweet breads leave more sticky residue than plain white loaves. Anything with fruit or nuts leaves crumbs in odd corners. And if your last loaf overflowed, there's likely hidden residue near the heating element.
That kind of buildup needs a careful wipe before storage, not just a quick rinse.
Short-Term Storage (Under 2 Weeks): The Quick-Look Routine
If you're baking twice a week, you don't need the deep clean. You need a repeatable 10 minute habit. The goal is simple: keep residue from hardening and keep moisture from settling.
Here's the routine:
- Pull out the bread pan and paddle.
- Wash them in warm, soapy water.
- Dry every part with a towel.
- Let the paddle shaft air dry for at least one hour.
- Wipe the interior walls and lid seal with a damp cloth.
- Leave the lid cracked open.
- Tuck the machine into its usual spot.
That last step gets skipped more than any other. People wash the pan, wipe the interior, then close the lid tight. The trapped air eventually condenses inside.
If the machine lives on your countertop instead of a cabinet, drape a light dish towel over it. That keeps dust off without locking in humidity.
Is short-term storage actually different?
Yes. Short-term storage is about preventing residue from hard-baking. Long-term storage is about preventing moisture damage.
The short routine takes 10 minutes and doesn't require disassembly. The long routine takes an afternoon, because you're preparing the machine to sit untouched for months.
Long-Term Storage (3+ Months): The Full Dock-Out Routine
If the machine won't run again for months, treat it like an appliance hibernation. Manufacturer specifications indicate the paddle shaft has to be bone dry before the unit is tucked away. That single detail prevents most long-term storage failures.
Here's the full process:
- Unplug the machine and remove the bread pan and paddle.
- Wash and dry both pieces completely.
- Wipe out the interior with a damp cloth to catch loose crumbs.
- Inspect the heating element for stuck residue. Remove it gently with a dry brush or cloth.
- Leave the lid open for a full 24 hours. This lets the hinge, seal, and interior air out.
- Add a silica gel packet inside the machine to absorb residual humidity.
- Wrap the power cord loosely. Don't force it into a tight loop.
- Cover the machine with a breathable cloth or store it in its original box.
- Place it in a cool, dry, stable spot. Avoid garages, basements, and any space with temperature swings.
- Check on it monthly. Open the lid, peek inside, and feel for any moisture.
As of 2026, the most common storage-related failures reported by owners are mold, stuck paddles, and cracked nonstick coatings. All three trace back to the same two mistakes: storing it damp or storing it in a space with high humidity.
Why 24 hours of airing out?
Because a towel can't reach every crevice. The paddle shaft is hollow on many models, and the seal around the lid traps moisture in a thin film. Twenty-four hours with the lid open lets that moisture evaporate naturally.
If you skip it, you're sealing damp air inside the machine. That's how musty smells start.
Is a sealed plastic bin a good idea?
Usually not. A plastic bin with a tight lid traps any moisture that escapes from the machine. If the room is humid, that bin becomes a mini greenhouse.
A cloth cover or the original box lets the machine breathe while still keeping dust out. If you must use a plastic bin, leave the lid slightly open and add silica gel.
Cabinet vs. Countertop vs. Garage: Choosing the Right Spot
The best place for your bread machine is a kitchen cabinet or pantry shelf. Countertops work too, but they expose the machine to daily grease, dust, and sunlight. Garages are the worst option unless you live in a climate-controlled space.
| Location | Temperature stability | Humidity risk | Pest risk | Verdict |
|---|---|---|---|---|
| Kitchen cabinet | Stable, room temp | Low if dry | Low | Best choice |
| Countertop | Stable but exposed | Low | Low | Fine with a cloth cover |
| Garage | Swings with weather | High in summer | High | Only in sealed containers |
| Basement | Cool, often damp | High | Medium | Avoid unless dehumidified |
If you have no cabinet space, use a countertop with a breathable cover. If you have no choice but a garage, put the machine in a sealed bin with a silica gel packet and check it monthly. Machines kept in dry cabinets show significantly fewer storage-related failures than those in garages across verified owner reports.
Lid Open or Closed? The Two Biggest Storage Debates
Leave the lid slightly ajar. Always. A fully sealed lid traps any leftover moisture inside, and that moisture turns into musty smells within weeks.
The debate about the lid position has a clear winner.
Lid open vs. closed: The open position allows airflow. The closed position creates a microclimate. If dust is a concern, drape a thin cloth over the machine with the lid cracked underneath.
Assembled vs. disassembled: For short-term storage, keep the pan and paddle in place. For anything over a month, remove them and store separately. The pan holds residual oils that can go rancid, and the paddle shaft needs to breathe.
This is the storage debate that actually matters.
The Step-by-Step Storage Guide (Both Routes)
Here's the full workflow in one place. Choose your route, then follow the matching steps.
Short-Term Route (Under 2 Weeks)
- Unplug the machine.
- Remove the bread pan and paddle.
- Wash and dry both parts.
- Wipe the interior walls and lid seal.
- Let the paddle shaft air dry for an hour.
- Leave the lid cracked.
- Store in a cabinet or under a cloth cover.
Long-Term Route (3+ Months)
- Unplug and fully disassemble.
- Wash and dry the pan and paddle.
- Inspect the heating element for crumbs.
- Leave the lid open for 24 hours.
- Add a silica gel packet.
- Wrap the cord loosely.
- Cover with a breathable cloth or store in the original box.
- Place in a cool, dry, stable spot.
- Check monthly for moisture or pests.
The difference between the two routes is drying time and disassembly. The long route gives every hidden crevice time to air out. The short route is just a 10 minute habit.
Common Storage Mistakes That Ruin Bread Machines
The biggest mistake is storing a machine that isn't fully dry. That single error causes more mold and odor problems than any other. The second biggest is leaving crumbs near the heating element.
Here's what verified buyer feedback reports as the most damaging mistakes:
- Closing the lid immediately after cleaning. Trapped moisture turns into musty smells.
- Storing with the pan in place. Residual oils go rancid over months.
- Tight-coiling the power cord. Kinks weaken the insulation over time.
- Putting it in a sealed plastic bin. Without airflow, humidity builds up inside.
- Avoiding the paddle shaft during cleaning. Dried residue hardens like cement.
- Storing it in a garage or basement. Temperature swings cause condensation.
If your last loaf overflowed, the residue likely found its way near the heating element. That's the hardest spot to reach, and it's exactly where an unexpected overflow issue leaves hidden buildup. Clean that area carefully before any storage period.
How to Bring a Bread Machine Back to Life After Storage
Inspect everything before you plug it back in. Check the paddle shaft, the pan's nonstick surface, and the heating element for any residue that formed during storage. Look inside the lid seal for mold.
If you spot mold, wipe it away with a damp cloth and white vinegar. Let the machine air out with the lid open for a few hours. Then run an empty cycle with just water to clear any lingering odors.
A musty smell usually comes from trapped moisture, not mold. Place the machine in a dry, ventilated spot for 24 hours with the lid open. If the smell persists, wipe the interior with a lemon water solution and air dry again.
If the paddle doesn't turn freely, clean the shaft thoroughly. Sticky residue can form even after a proper drying period. These revival steps work for most machines, and the key is patience.
Never force a stuck paddle, since that can strip the drive mechanism.
Storage Equipment Worth Buying (and What's Overkill)
You don't need much. Most bread machines store perfectly fine with items you already own. But a few small purchases make long-term storage safer.
| Item | Helps? | Why |
|---|---|---|
| Silica gel packets | Yes | Absorbs residual moisture inside the machine |
| Breathable cloth cover | Yes | Keeps dust off while letting air circulate |
| Original box | Yes | Best protection if you have the space |
| Sealed plastic bin | No | Traps humidity, creates a mini greenhouse |
| Airtight container | No | Same problem, worse airflow |
| Furniture polish | No | Can leave residue that attracts dust and pests |
If you're in a humid climate, silica gel is worth it. Rechargeable packets cost a few dollars and last for years. Just remember to recharge them monthly by drying them in the oven.
A cloth cover like a cotton dish towel works fine for countertop storage. Skip any product that promises a perfect sealed environment, because sealed traps moisture.
Frequently Asked Questions
How long can a bread machine sit unused?
Most bread machines can sit unused for months without any issue, as long as they're stored clean and dry. Three to six months is completely normal for seasonal bakers. The main risks after that are pests, dust, and humidity, not the machine's mechanical parts.
Can I store a bread machine on its side?
No. Always store it upright. Laying it on its side can shift the heating element and put stress on the hinge mechanism.
It also lets any trapped crumbs or residue settle into the motor housing. Upright storage is the only safe position.
What if I already stored it while damp?
Take it out immediately. Wipe down the interior, remove the bread pan and paddle, and leave the lid open for a full 24 hours. Inspect the heating element for rust and the lid seal for mold.
If you see mold, clean it with white vinegar and dry thoroughly before using the machine again.
Do I need to remove the paddle before storage?
For short-term storage, no. For anything beyond two weeks, yes. The paddle shaft holds moisture and residue that can harden over time.
Removing the paddle lets the shaft air out and prevents the paddle from sticking to the pan.
Can I use a plastic storage bag?
A large plastic bag works only for dust protection, not moisture control. If the machine is completely dry, a bag is fine. But any trapped humidity will condense inside overnight.
A breathable cloth cover is safer for long-term storage.
The 30-Second Decision Guide
If you're short on time, here's the entire process in a snapshot.
| Situation | Do this |
|---|---|
| Baking weekly | Wash pan, dry everything, crack the lid, store in cabinet |
| Storing for a month | Wash, dry, remove the paddle, crack the lid, add silica gel |
| Storing for a season | Full disassembly, 24-hour air out, silica gel, cloth cover, monthly check |
| Bringing it back out | Inspect for mold and residue, run an empty water cycle, wipe and dry |
That's it. Clean, dry, breathe. The machine is a workhorse, but it doesn't like moisture.
Respect that one rule, follow the routine that matches your timeline, and it'll be ready for your next loaf whenever you are.

Similar Posts