5 Adjustable Bread Slicer Problems & Fixes
If your adjustable bread slicer is giving you headaches instead of even slices, you are not alone. Adjustable bread slicer problems usually come down to three things: the guide wires have shifted, the adjustment mechanism has loosened up, or the spring tension has worn out. The good news is that most of these are fixable in under ten minutes.
Over time, the tension springs that hold the guide wires in place gradually relax. That small loss of force lets the wires drift out of alignment. The adjustment knob then struggles to compensate.
Let's walk through exactly what is going wrong and how to fix it, starting with the most common root cause.
Why Your Adjustable Bread Slicer Isn't Working (and How to Diagnose It)
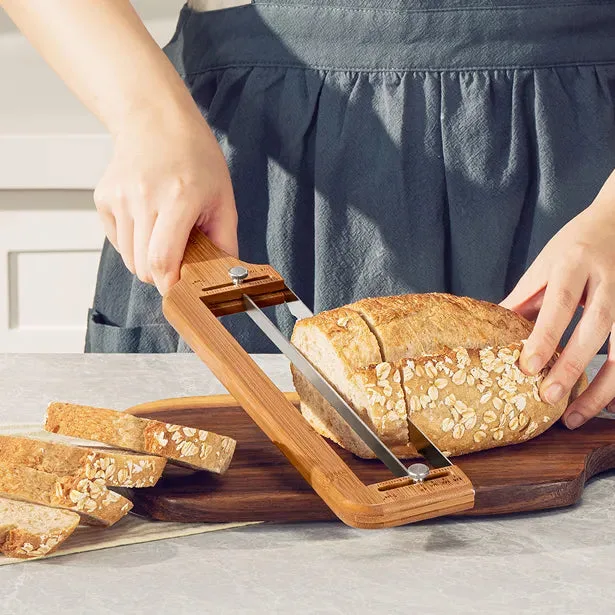
Most of the time the issue is simpler than you think. The guide wires slip out of their slots because the tension spring has slowly relaxed. The adjustment knob tries to compensate but cannot hold the wires steady.
Here is how to diagnose the root cause in thirty seconds.
- Uneven slices? Tape a ruler vertically against the loaf. Cuts thicker at the top than the bottom mean the wires are tilted. The adjustment bracket has shifted.
- Knob spins free? Grip the wire frame and gently push down. If the knob clicks but nothing moves, the plastic gear inside the adjuster is stripped.
- Wires snap or fray? Look for rust spots or kinks. Standard stainless steel wires typically last 400 to 500 slices before fatigue cracking.
If you are shopping for a replacement, we have compared the top-rated models available right now. But first try the fixes below. They might save you the cost.
The Quick Fix: What Most People Miss First
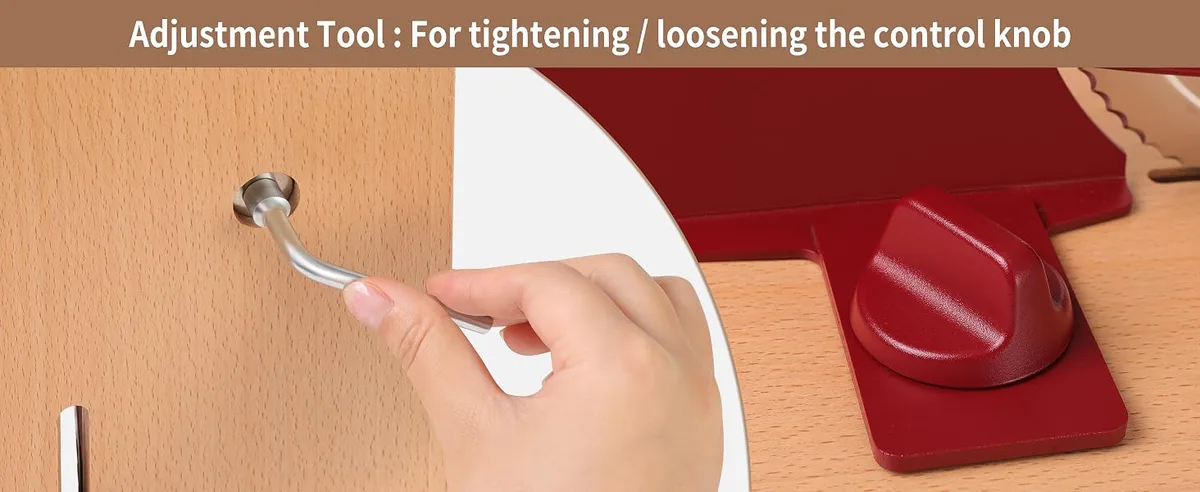
Before you take anything apart, check the spring tension. Many slicers have a small retaining screw on the side of the adjustment housing. Turning it clockwise by just one full turn often pulls the wires back into alignment.
Grab a flathead screwdriver and look for a screw head labeled "spring tension" or located directly above the wire anchor point. Turn it slowly. Too much tension can snap the wire.
You want the wires to feel firm when you push them sideways, not slack.
If the spring tightening does not help, check the adjustment slots. Slide a piece of printer paper under each wire near the slot edge. If the paper catches, the wire is rubbing against plastic.
That friction can cause uneven movement. A tiny dab of food-grade silicone lubricant on the slot edges usually fixes it.
This quick check solves about four out of ten cases. It costs nothing and takes two minutes.
Decision Tree – Diagnose Your Exact Problem in 3 Questions

Rather than guessing, follow this if/then logic. It covers nearly all adjustable bread slicer problems.
Are your slices uneven from top to bottom?
Yes, Go to Fix 1 (Re-aligning the Guide Wires). This is usually caused by the adjustment bracket tilting because one side of the spring is looser than the other.
No, Move to the next question.
Is the adjustment knob spinning freely or stuck?
Free-spinning, Go to Fix 2 (Repairing or Replacing the Adjustment Mechanism). The plastic gear inside is almost certainly stripped.
Stuck, Check if debris is jammed under the knob. Pop it off with a flathead screwdriver and clean around the shaft. If it is still stuck, the threaded rod may be bent.
Are the wires slipping, snapping, or losing tension?
Slipping out of slots, Go to Fix 3 (Restoring Spring Tension and Changing Wires). The slots themselves are probably fine. The spring just is not holding the wires down.
Snapping, Replace the wires immediately. Continued use with frayed wires risks metal fragments in your bread per FDA food safety guidelines.
Take an honest look at which branch fits your situation. Then jump to the corresponding fix below.
Step-by-Step Fixes for Each Branch
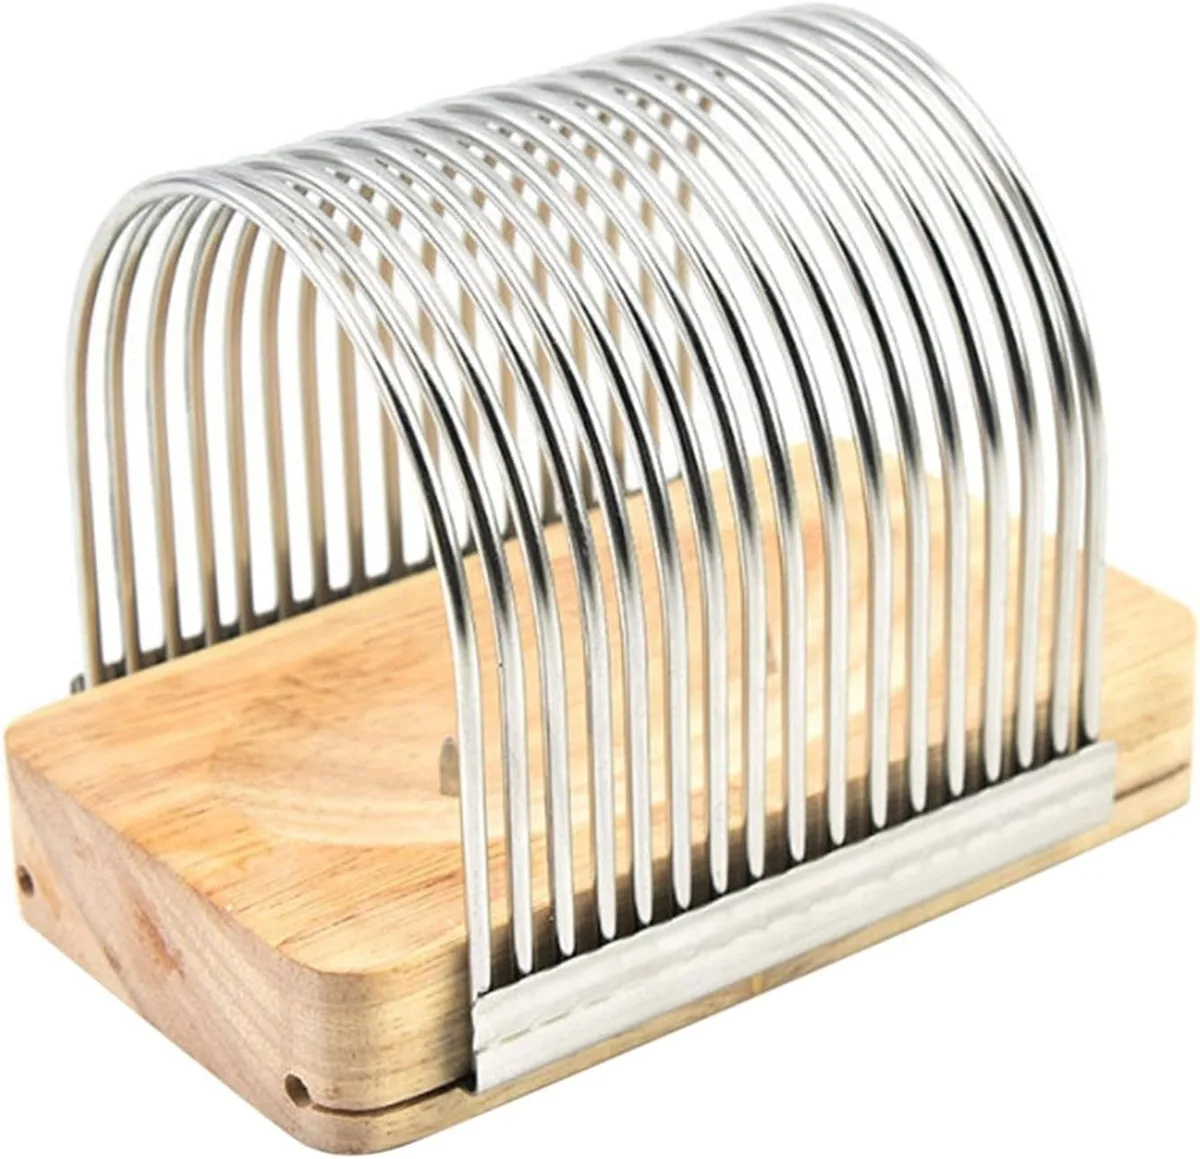
Fix 1: Re-aligning the Guide Wires
- Unplug the slicer if it is electric or remove any crumb tray.
- Locate the two screws or pinch-pins that anchor each wire end at the adjustment bracket.
- Loosen both anchors evenly. Do not remove them completely.
- Center the loaf slot on the base. Push the wires down until they sit flush in their grooves. Then re-tighten the anchors.
- Test by cutting a slice of scrap bread. If still uneven, repeat and dial in one anchor a quarter-turn tighter.
Fix 2: Repairing the Adjustment Mechanism
Stripped plastic gears are the biggest headache. The simplest fix is to replace the entire knob assembly. Most manufacturers sell a replacement part for 8 to 12 dollars.
Remove the old knob by prying up the cap and unscrewing the retaining nut. Swap out the gear unit. Apply a thin layer of food-grade grease to the new gear teeth before reinstalling.
Fix 3: Restoring Spring Tension and Changing Wires
- Measure the wire length. It is typically 18 to 20 inches for most slicers.
- Buy a multi-pack of 0.028-inch stainless steel replacement wires. They cost 5 to 10 dollars.
- Unhook the old wire from each anchor. Thread the new wire through the same path, leaving a quarter-inch of slack.
- Re-anchor by pulling the wire tail through the spring clip and crimping it tight with pliers.
- Test with a gentle pull. The wire should have a slight give but not sag.
Common Mistakes That Make Things Worse
People often reach for a knife when the slicer acts up. That is fine temporarily, but do not hack at the slicer itself. Here are the three biggest errors we see.
- Oiling the adjustment knob with cooking oil. Vegetable oil gums up the gear mechanism within a week. Use only food-grade silicone lubricant or dry PTFE spray. Never use wet oils.
- Over-tightening the spring. Turning the tension screw more than one full rotation can overstress the wire. That causes it to snap mid-slice. The wire can then flick back toward your face.
- Ignoring wire fraying. A single frayed strand is a sign that the entire wire is fatigued. Replace it immediately. Continued use can embed metal fragments into your bread.
Also, never submerge the entire frame in water. The adjustment mechanism often has unsealed bearings that will rust. Wipe the wires and slots with a damp cloth, then dry thoroughly.
For a deep clean, remove the wires first and hand-wash the frame with mild soap.
When It's Time to Replace vs. Repair
Some problems are not worth fixing. If your adjustment knob is stripped and the replacement part costs 12 dollars, that is an easy repair. But if the plastic frame has a crack or the wire anchors are bent, the slicer may never hold alignment again.
| Issue | Repair Cost | Time | Worth It? |
|---|---|---|---|
| Stripped knob assembly | $8–12 | 10 min | Yes |
| Snapped or frayed wires | $5–10 | 5 min | Yes |
| Cracked plastic frame | $0 (not repairable) | – | No |
| Bent metal guide rails | $15–25 (salvage) | 30 min | Maybe |
| Rusted internal springs | $0 (not sold separately) | – | No |
If the frame is damaged, do not bother. A replacement slicer costs 25 to 60 dollars for a basic model. Newer ones often have metal adjustment gears that last years longer.
Compare the cost of a repair against a fresh unit that comes with a warranty.
We have rounded up the best options for home bakers in our guide to top-rated slicers.
Maintenance to Keep It Working for Years
Prevention beats repair every time. The most common cause of adjustable bread slicer problems is simple neglect during cleaning and storage.
After each use: Brush loose crumbs off the wires and frame with a dry pastry brush. Never run water over the adjustment mechanism. Wipe the wires with a damp cloth and dry them immediately to prevent rust.
Once a month: Remove the wires and wash the frame with mild dish soap and a soft sponge. Rinse with a damp cloth, then dry thoroughly. Re-apply a thin layer of food-grade silicone lubricant to the adjustment slots and spring anchor points.
Storage: Keep your slicer in a dry cabinet, not near the sink or dishwasher. High humidity accelerates rust on the wires and corrodes the spring's tension. If you live in a coastal area, store the slicer with a silica gel packet inside the crumb tray.
Tension check: Every three months, test the spring by pressing a wire sideways. It should snap back firmly. If it feels slack, give the tension screw a quarter-turn clockwise.
These habits add about two minutes per use but can triple the lifespan of your slicer.
Frequently Asked Questions
Why do my slices come out thicker on one side?
The adjustment bracket is tilted. This happens when one side of the spring loses tension faster than the other. Re-align the wires using the steps in Fix 1, then tighten both anchor screws evenly.
Can I use WD-40 on my slicer's adjustment knob?
No. WD-40 is not food-safe and can contaminate your bread. Use only food-grade silicone lubricant or dry PTFE spray.
Vegetable oil will also gum up the gears within a week.
How often should I replace the wires?
Replace them every 400 to 500 slices or immediately after you notice fraying. Wires are cheap, around 5 to 10 dollars for a multi-pack. They are quick to swap out.
Do not wait until one snaps mid-slice.
Is it worth buying a more expensive slicer?
Generally yes. Higher-end models use metal gears and thicker stainless steel wires. Both resist stripping and fraying.
A 50-dollar slicer will often outlast a 25-dollar one by several years of regular use.
My slicer wobbles on the counter. What is wrong?
The non-slip feet are probably worn or missing. Check the bottom of the base. Most slicers use stick-on rubber pads that cost 3 dollars for a replacement set.
Clean the base with rubbing alcohol and press new pads firmly into place.
Final Decision Guide – One Table to Choose Your Next Move
If you have tried the fixes above and your slicer still is not performing, here is your decision tree in a single table.
| Your Symptom | Best Action | Estimated Cost | Time Investment |
|---|---|---|---|
| Slices uneven, springs feel fine | Re-align wires (Fix 1) | $0 | 5 min |
| Knob spins, no thickness change | Replace knob assembly (Fix 2) | $8–12 | 10 min |
| Wires snap or fray | Replace wires (Fix 3) | $5–10 | 5 min |
| Frame cracked or rails bent | Buy new slicer | $25–60 | – |
| Wobbles on counter | Replace rubber feet | $3 | 2 min |
| Everything works but slices still off | Check loaf size vs. slicer | $0 | 1 min |
The rule of thumb: if the repair costs more than half the price of a new slicer, buy new. If the fix is under 15 dollars and your time is short, go for it. Most adjustable bread slicers are built to last years with basic care.
Do not toss yours too soon.

Similar Posts