What Order Do You Add Ingredients to a Bread Machine?
How to add ingredients to a bread machine might sound simple, but the order you choose makes or breaks the rise. The recipe itself rarely fails. The placement of your liquid, flour, yeast, and mix-ins does.
In our research across manufacturer manuals, the most common instruction is to start with liquids. Most standard machines recommend water around 80°F (27°C). As of 2026, every major brand uses either a wet-first or dry-first order, and getting it backwards can crush your loaf before it begins.
Before you measure anything, check your manual. That's the first step, and it's the one most people skip.
Why Loaves Fail Even When the Recipe Is "Right"
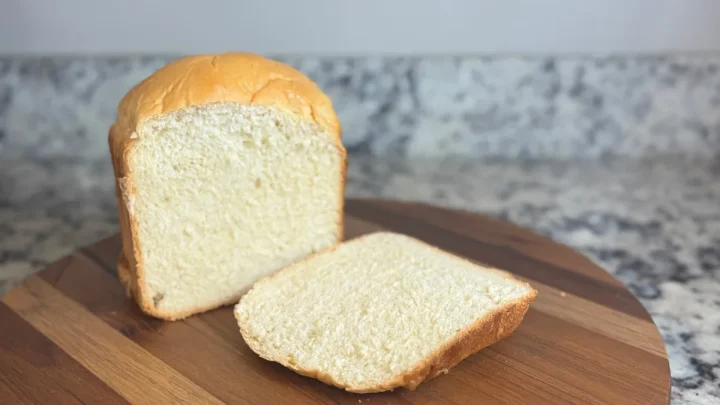
Open a user forum and you'll see the same photos over and over. A short, squat loaf. A dense crumb.
A pile of steamed raisins inside a mixing glop. The recipes look fine, but the ingredients went in the wrong order, or the yeast touched the salt, or a sticky shred of date gummed up the dispenser.
Common failure points include:
- Yeast touching liquid before the cycle begins.
- Salt landing directly on the yeast.
- Dried fruit added too early and pulverized.
- Dispenser doors jammed by melted chocolate.
- Pan overfilled with heavy seeds and nuts.
Some failures are even messier. Dough can climb over the pan rim and bake onto the heating element. If you've dealt with that mess, you'll want to understand the overflow issues that trigger it.
The good news? Nearly every one of these is preventable. You just need to match your workflow to the machine sitting in front of you.
The Quick Answer: Read Your Manual Before You Measure Anything
Check your manual first. Most machines want liquids in first, then dry ingredients, then yeast. Some machines reverse that order.
Never rely on a generic recipe.
Your manual is the only source that knows your machine's specific pan size, dispenser type, and kneading design. Generic internet instructions can't tell you whether your model expects flour before water or the other way around.
How Ingredient Addition Works Inside the Machine
Before you touch a bag of flour, it helps to understand what happens after you press start.
Most machines begin with a short rest period, then a long first knead. During that phase, the paddle mixes liquid and dry ingredients into a rough dough. The second knead, which is usually shorter, is when the machine folds in any extra ingredients from the dispenser or waits for you to add them manually.
| Cycle Phase | What Happens | When Mix-Ins Enter |
|---|---|---|
| Rest | Ingredients hydrate | Nothing added |
| First knead | Gluten develops | Keep out |
| Second knead | Dough is elastic | Dispenser drops or beep sounds |
| Rise | Dough proofs | Nothing added |
| Bake | Crust sets | Nothing added |
Automatic dispensers work on a timer. They release fruit and nuts at the start of the second knead. If you're adding by hand, the machine beeps at that same moment.
Miss it, and you'll have to either stop the machine or accept a loaf without mix-ins.
The critical part is the yeast. Most machines keep it in a little well on top of the flour. That keeps it dry until the paddle pulls it down into the liquid during the first knead.
If you bury yeast under salt or drop it into warm milk, the rise changes completely.
And if you plan to use the delay timer with perishable additions, check the USDA food safety guidance first. Overnight milk or eggs can sit too long at room temperature before baking begins.
Your Machine's Ingredient Order: Check for These Three Things
Grab your manual and open the bread pan. Then look for these three details.
Kneading paddle. Some paddles sit flush on the bottom, others are mounted on a shaft. The paddle position tells you which direction the dough moves, but it doesn't change ingredient order. What matters is making sure the paddle is firmly seated before you add anything.
Yeast well. Some machines have a separate compartment for yeast on the lid or in the pan's center. If yours has one, you add yeast there, not on the flour. If it doesn't, the yeast goes into a small well dug into the dry flour.
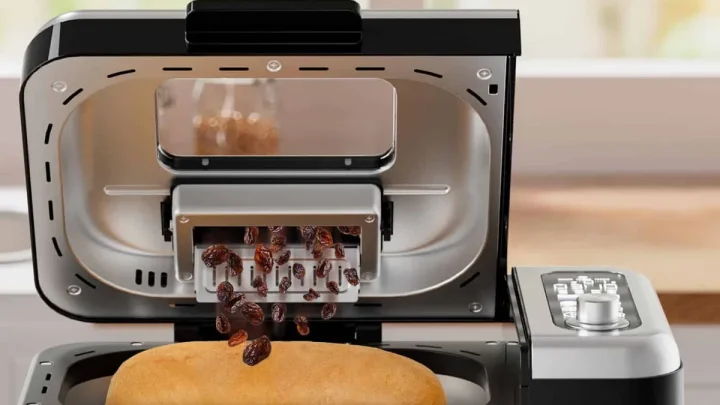
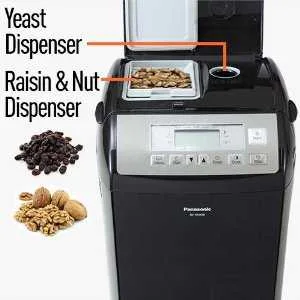
Dispenser doors. Look for a small hinged lid under the machine's main lid. That's the automatic dispenser. It has slots for two or three ingredients. Usually the left side is for yeast, the right for fruit and nuts. Load it exactly as the manual says, because sticky ingredients can clog the doors.
These three checks take about two minutes. They'll save you from guessing later. If your manual has a diagram of the order, keep it open while you work.
If you ever see dough pushing past the pan, that's an overflow red flag. Get that corrected first, because a loaded dispenser won't help if the machine is covered in batter.
Step-by-Step: How to Add Ingredients to a Bread Machine
Here's the exact workflow that works for the majority of bread machines. Double-check your manual, because the order can flip for some models.
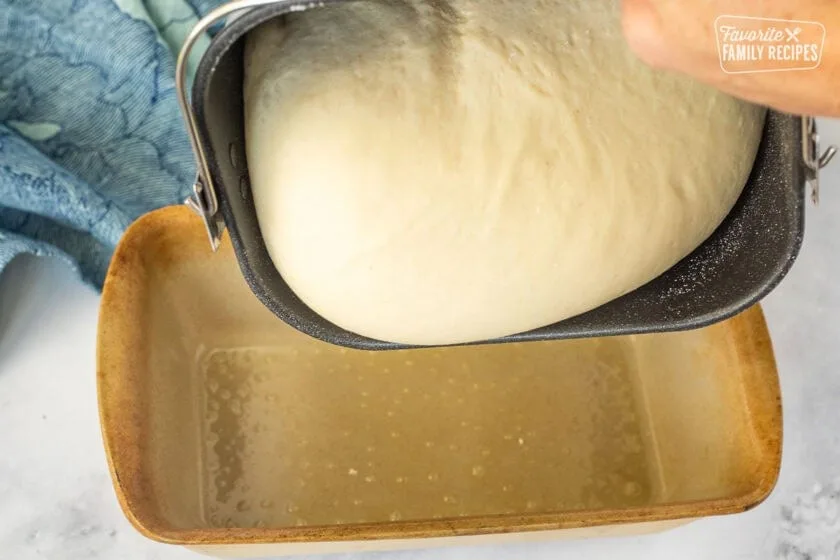
Prep the pan and paddle. Remove the bread pan from the base. Slide the paddle onto the shaft until it clicks. Give it a light tug to confirm it's seated.
Add liquids first. Water, milk, eggs, or melted butter go into the pan. Keep liquids around 80°F unless your recipe says otherwise. Hot liquid can kill yeast before the cycle runs.
AdvertisementLayer the dry ingredients. Flour goes in on top of the liquids. Sprinkle sugar, salt, and powdered milk around the edges. Keep them in separate corners so they don't meet the yeast directly.
Place the yeast. Make a small well in the center of the flour. Drop the yeast into that well, away from salt and sugar. If your machine has a yeast dispenser, load that instead.
Load the add-in dispenser. If you're using dried fruit, nuts, seeds, or chocolate chips, put them in the automatic dispenser. Don't cram the compartment, or sticky pieces will jam it.
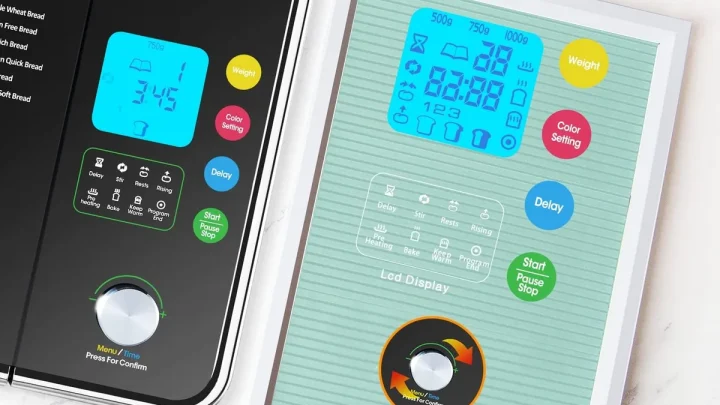
Select the cycle and start. Choose the basic, whole wheat, rapid, or gluten-free cycle based on your recipe. Set the crust color. Press start.
Wait for the beep for manual mix-ins. If your machine lacks a dispenser, set a timer for the beep. When it sounds, open the lid and sprinkle in the extras. Do it quickly, but don't rush so much that you drop a measuring cup in.
Advertisement
The most reliable way to measure all of this is by weight, not volume. A kitchen scale removes the guesswork from flour and water amounts.
If you're using the delay timer, swap perishable ingredients for shelf-stable ones. Milk, eggs, and cheese can sit at room temperature for hours, which turns into a food safety problem, not just a texture one.
That's the complete loading process. Get these seven steps right, and you're 90% of the way to a perfect loaf.
Decision Branches: What to Add and When
Not every bread machine loads the same way. Your workflow depends on the machine's design and the loaf you're baking. Here's how to decide what to add and when.
- If your machine has an automatic dispenser. Load it before you press start. Put dried fruit, nuts, or seeds in the right-side compartment. If you have a yeast slot, use that for yeast instead of creating a well in the flour.
- If your machine has no dispenser. You'll add mix-ins when the machine beeps. That beep signals the start of the second knead. Open the lid and sprinkle your ingredients evenly over the dough.
- If you're using the delay timer. Keep perishables out. Milk, eggs, and cheese sit at room temperature overnight, which invites bacteria. Following USDA guidelines, keep these refrigerated until baking starts.
- If you're baking whole wheat. Add an extra 1 to 2 tablespoons of water. Whole wheat flour soaks up more moisture than all-purpose flour. The order stays the same, but the hydration changes.
- If you're baking gluten-free. The dough is wetter and more delicate. Add heavy mix-ins by hand at the beep rather than in the dispenser. In fluid gluten-free dough, seeds and nuts sink fast.
Missed the beep? Don't panic. Open the lid and drop your ingredients in during the second knead.
You have a short window before the machine shifts to the rise cycle.
Mistakes to Avoid (and What Actually Goes Wrong)
A few small errors ruin more loaves than bad recipes. Here's what we see most often.
- Yeast touching salt. Salt kills yeast and slows the rise. Place salt in one corner of the pan and yeast in a separate well or the opposite corner.
- Water that's too hot. Liquid above 115°F kills yeast on contact. Use water around 80°F for most machines. Your manual will confirm the target temperature.
- Clogged dispenser doors. Sticky ingredients like raisins, chocolate chips, and dates jam the small hatch in the lid. The photo above shows how the pieces build up. If you're using sticky add-ins, drop them in by hand at the beep instead.
- Overfilling the pan. Every machine has a rated capacity. A 1.5 lb machine handles about 2 cups of flour. Anything more can push dough over the rim. If you've ever dealt with dough spilling over the pan, our detailed guide breaks down the causes.
Also check your yeast. Expired yeast won't give a proper rise. The package date matters more than you'd think.
Maintenance: Keep the Pan, Paddle, and Dispenser Ready
The machine works best when the parts stay clean. A little upkeep goes a long way.
- Wash the bread pan by hand after every loaf. Mild soap and warm water are enough. Most nonstick coatings don't survive dishwasher cycles.
- Remove the paddle and wash it separately. Dough builds up around the shaft and dries hard if you skip this.
- Inspect the dispenser doors. Sticky residue can keep them from falling shut, which affects the next bake.
- For a serious clog, soak the dispenser lid in warm soapy water for 15 minutes.
Manufacturer manuals emphasize the same care routine. Official Zojirushi instructions, for example, recommend hand-washing all nonstick parts to keep the coating intact.
Dry the pan completely before the next use. A wet pan changes hydration and makes the dough stick to the paddle.
Real Scenarios: What a Week of Bread Machine Baking Looks Like
Three workflows cover most home bakers. Here's how they play out.
Overnight white loaf. Load the pan at 10 PM. Water, flour, salt, and yeast, in that order. Set the delay timer for eight hours.
No milk or eggs inside. At 6 AM the machine starts kneading and bakes fresh bread for breakfast.
Whole wheat with raisins. Build a whole wheat dough with an extra tablespoon of water. When the beep sounds, open the lid and sprinkle in the raisins. The dispenser tends to crush soft fruit, so manual timing works better.
Gluten-free quick loaf. Use the gluten-free cycle and watch for an earlier add-in beep. The knead phases are shorter. Add seeds or nuts as soon as you hear it.
Avoid the dispenser for gluten-free dough, since the wet batter lets heavy pieces sink.
Each scenario follows the same rule. Liquids first, dry ingredients next, yeast last. The only real difference is when and how the mix-ins go in.
Frequently Asked Questions
Do I always put liquid ingredients in first?
Yes, for most machines. Liquid goes in first to keep yeast dry until the paddle pulls everything together. Then dry ingredients, with yeast placed into a small well in the flour.
A few models reverse the order, so check your manual before you assume.
Can I add shredded cheese or oats the same way as dried fruit?
Not exactly. Cheese melts and can gum up the dispenser doors. Oats float and often fall unevenly.
Both are best added by hand at the beep. Sprinkle them over the dough while the paddle is still mixing.
What should I do if I miss the add-in beep?
Open the lid during the second knead and drop the ingredients in quickly. You have a short window before the rise cycle starts. If you miss that too, stop the machine, add the mix-ins, and restart the cycle from the beginning.
The loaf may be a little dense, but it will still bake.
Why does my machine overflow no matter what I add?
Overflow usually means too much hydration or too much flour for the pan. Weigh your ingredients instead of scooping. Also check that you're using the right cycle.
A rapid cycle kneads more aggressively, which can push dough up and over the rim.
Final Decision Guide: Your Next Loaf, Step by Step
Run through this checklist every time you load your bread machine. It takes less than two minutes and covers the decisions that actually change the outcome.
Start with your machine type
- Automatic dispenser? Load liquids, dry ingredients, and yeast into the pan first. Then fill the dispenser with mix-ins. The machine drops them during the second knead.
- No dispenser? Follow the same loading order. When the machine beeps, open the lid and add your extras manually.
Match the cycle to your recipe
| Cycle | Best For | Ingredient Adjustments |
|---|---|---|
| Basic | White and all-purpose loaves | None |
| Whole wheat | Whole wheat and multigrain | Add 1 to 2 tbsp water |
| Rapid | Short-notice baking | Use instant yeast |
| Gluten-free | Rice and tapioca flours | Add mix-ins by hand |
| Dough | Pizza and dinner rolls | Use 1 tsp active dry yeast |
Follow the loading order
- Seat the kneading paddle firmly.
- Pour in liquids at 80°F.
- Add dry ingredients on top.
- Place salt in a corner.
- Make a small well in the flour.
- Drop in the yeast.
- Load the dispenser if you have one.
After pressing start
Set a timer if your machine lacks a dispenser. Listen for the add-in beep. Add your fruit, nuts, seeds, or chocolate within a minute.
Keep the lid open only long enough to sprinkle them in.
When things go wrong
Check for the two most common causes. Expired yeast won't produce a full rise. Water above 115°F kills the yeast entirely.
Fix those first before adjusting anything else.
Final reminder
Your manual is the truth. Our guide covers the standard workflow, but your machine's wiring and paddle design may change the order. Skim the manual one time before your next bake.
That's the difference between a consistent loaf and a coin flip.
Now go make the bread. The machine does the heavy lifting from here.

Similar Posts