Use Your Bread Maker for Perfect Pizza Dough
Your bread maker is a pizza dough shortcut you might not be using yet. If you've ever wondered how to use a bread maker for pizza dough without ending up with a sticky disaster or a dense crust, the process is easier than you think. The trick is choosing the right cycle, stacking ingredients in the correct order, and knowing when to intervene.
It's not about pressing a button and walking away blindly.
Manufacturer specs show that most modern bread makers run a dedicated dough or pizza dough program that kneads and proofs for 60 to 90 minutes at a controlled temperature. That consistent environment is exactly what gluten needs. Ready to put your machine to work?
Let's talk about the first decision that sets everything else in motion.
The Quick Answer: Why a Bread Maker Makes Great Pizza Dough
To use a bread maker for pizza dough, select the dough or pizza dough cycle. Add wet ingredients first, then flour, then yeast last. Let the machine knead and proof the dough.
Remove it when the cycle finishes. Shape, top, and bake in your oven.
That's the whole process. The bread maker does the heavy lifting that usually wears out your arms, and it does it in a warm, sealed chamber that won't get disrupted by drafts or a slamming cabinet door.
The 90-Second Pitch: What Your Bread Maker Can Actually Do
A bread maker is not a one-trick pony. Yes, it bakes loaves, but the dough cycle is arguably its most versatile feature. That program is designed to knead, proof, and sometimes punch down dough without ever heating it enough to bake the crust.
You're essentially getting a mini proofing cabinet combined with a stand mixer.
That's a huge advantage when you're making pizza at home. Hand kneading takes 10 to 15 minutes of continuous effort, and most home cooks stop before the gluten is fully developed. The machine won't stop early.
It runs the full cycle every time, which is why the crust comes out chewier and more structured. As of 2026, even budget machines include some version of this program.
Choosing the Right Cycle: Dough, Pizza Dough, or Manual?
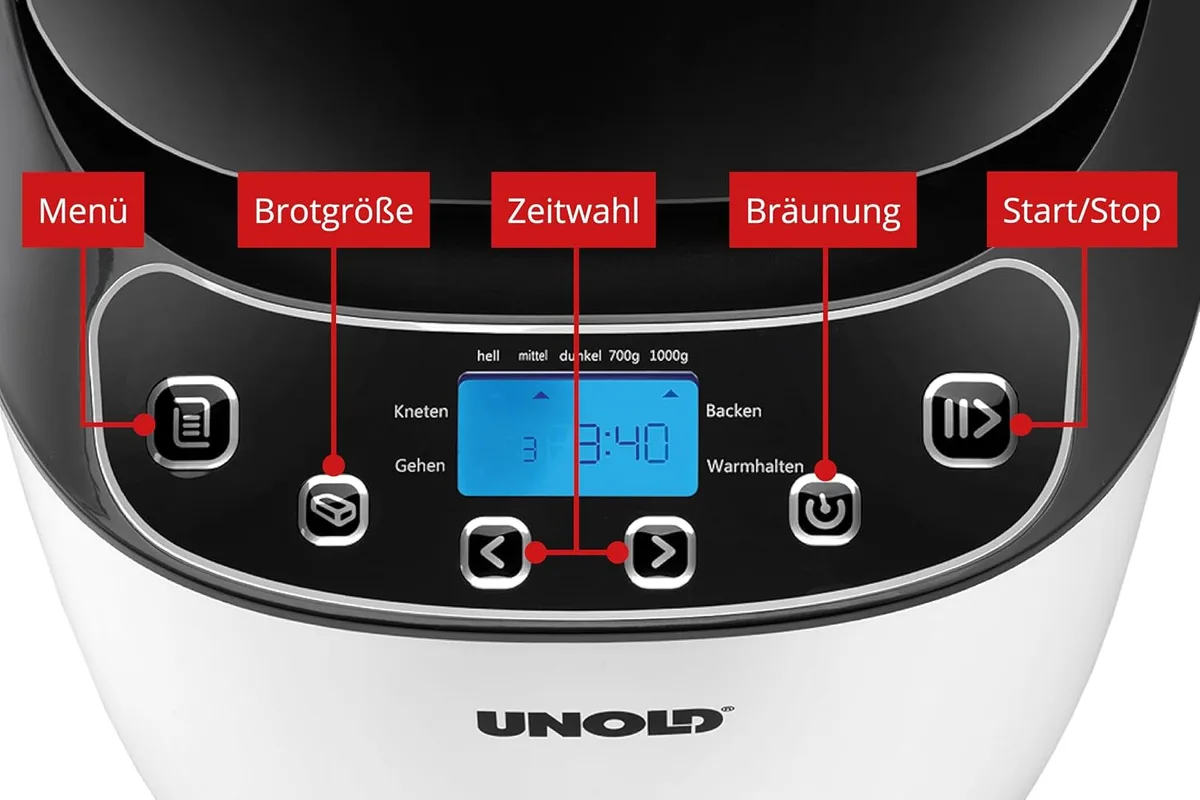
Here's where most people freeze up. The bread maker has six buttons, and you're not sure which one is right. Let's settle it now.
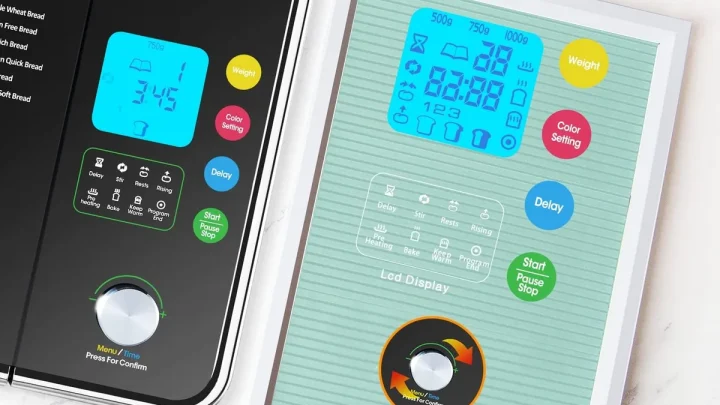
The answer depends entirely on what your machine offers. Some bread makers have a dedicated "pizza dough" setting. Others only have a generic "dough" cycle.
A few let you program everything manually. If you have all three, the pizza dough setting is usually the winner. It's tuned for a firmer, lower-hydration dough that holds its shape when stretched.
If your machine only has a plain dough cycle, don't worry. It works just as well. The generic dough cycle kneads and proofs, and that's all pizza dough really needs.
The "pizza dough" label is mostly marketing. The internal program isn't dramatically different from a standard dough cycle.
Decoding the Button: What Each Setting Actually Does
Let's break down what happens behind that little window.
- Dough cycle: Runs a short knead, then a long rise. Usually 60 to 90 minutes total. No heat, just a warm environment from the motor.
- Pizza dough cycle: Essentially the same as the dough cycle, but often with a slightly shorter proofing time to prevent over-risen, bubbly dough.
- Manual or custom cycle: Lets you set your own knead time, rise time, and even a low proofing temperature. Good for adjusting when you're using cold ingredients or live in a hot climate.
- Rapid or quick cycles: These rush the process. For pizza dough, skip them. The gluten needs time to relax and develop.
When to Use the "Pizza Dough" Setting vs. the Plain "Dough" Setting
Use the pizza dough setting when you want a crust that's thin and crisp in the center but puffs at the edges. That setting typically delivers a lower rise, which keeps the dough from becoming too airy.
Use the plain dough setting when your machine lacks a pizza option, or when you're making a thicker pan-style crust. The extra proofing time gives you a softer, bubblier texture. It also works well if you plan to let the dough cold-ferment in the fridge overnight afterward.
The golden rule: if your machine has a pizza dough setting, start there. If the dough looks too tight or doesn't rise enough, switch to the standard dough cycle next time. It's a simple branch in the decision tree.
What If Your Machine Has No Dough Cycle?
Believe it or not, some basic bread makers don't have a dough-only program. They only bake. In that case, you still have options.
You can use the machine for kneading only, then let the dough rise separately. Run a short bake cycle of about 10 minutes and stop it manually before the heating element cranks up. That will knead the dough, but you'll need to remove it and proof it in a covered bowl on the counter for an hour or two.
Or skip the bread maker entirely and hand knead. But honestly, if your machine has no dough cycle, it's probably an older model. Upgrading might be simpler.
The Core Process: How the Bread Maker Handles the Work
Once you've selected the cycle, the machine takes over. It uses a motor-driven paddle to knead the dough, then either a thermostat or the motor's residual heat to create a warm, draft-free place for the yeast to rise. Simple in theory, but a few details matter.
Why Machine Kneading Beats Hand Kneading (Most of the Time)
Kneading is about developing gluten, the protein network that gives pizza crust its chew. It requires repeated folding, stretching, and pressing. The bread maker does this with a consistent rhythm that's practically impossible to match by hand for 10 straight minutes.
Aggregate reviews from home bakers consistently report that bread machine dough is smoother and less sticky than hand-kneaded dough. That's because the machine works at a steady speed, never stopping to rest your tired arms. It also kneads in an enclosed space, which means less flour dust everywhere.
The Warm, Draft-Free Rise: How Your Machine Proofs Better Than a Countertop
Proofing pizza dough on a cold countertop in a drafty kitchen is a gamble. The yeast might take forever, or it might die if you're near an open window. The bread maker's chamber keeps the dough at a steady, relatively warm temperature between roughly 75°F and 85°F depending on the model.
That steady environment matters. Yeast activity doubles for every 10°F increase, up to a point. If your kitchen is too cold, the dough rises slowly and becomes dense.
Too hot, and the yeast burns out. In our research, the machine's internal temperature stays within a narrow band that's perfect for a predictable rise.
The Sticky Dough Problem: When to Add Flour, When to Walk Away
Almost every first attempt at bread maker pizza dough ends with the same panic. You open the lid, peek inside, and see a sticky blob clinging to the sides of the pan. Your first instinct is to add flour.
Don't.
Sticky isn't the same as wrong. Most pizza doughs intended for high-heat baking run at a 60 to 65 percent hydration ratio. That means for every 500 grams of flour, you'll use 300 to 325 grams of water.
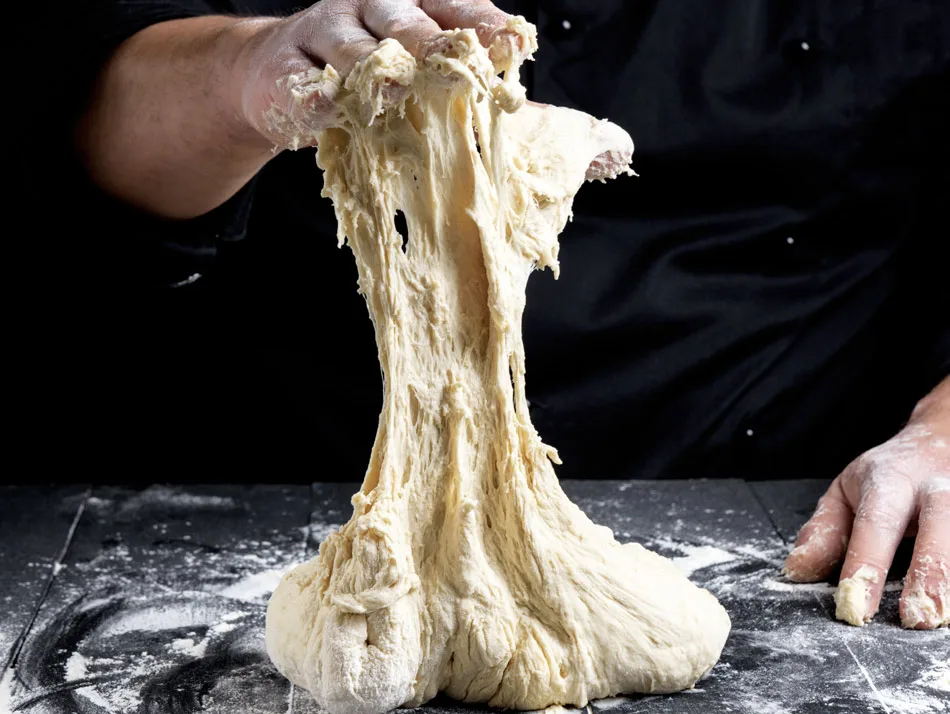
Dough at that hydration is tacky, not bone dry. It will stick to your fingers if you touch it directly. That's normal.
Reading the Dough Ball During the First Knead
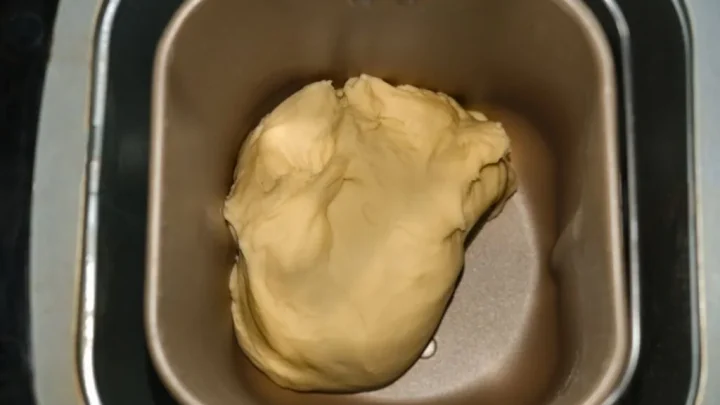
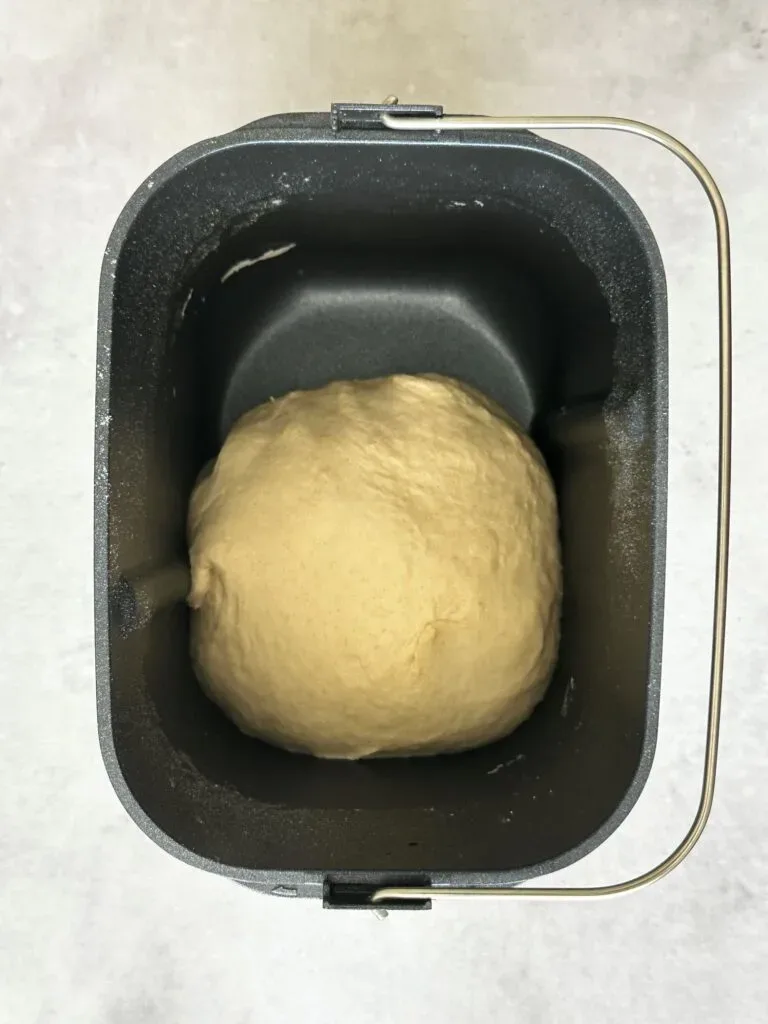
At around the 10-minute mark, open the lid and look. The dough should be massing into a rough ball and pulling away from the side of the pan. If it's still climbing the walls, that's a sign it needs more flour.
But here's the catch: you usually don't need to add any.
The gluten needs time to develop. A shaggy, sticky mass at minute two can become a smooth, soft ball by minute eight. Give it a few more minutes before you make any changes.
If it still looks like cake batter after 10 minutes, then add a tablespoon of flour at a time.
How Hydration Ratio Affects Stickiness and Crust Texture
Higher hydration means a stickier dough and a more open, airy crumb with a crisper crust. Lower hydration means a firmer dough that's easier to stretch but with a denser crumb. For a typical home oven, 62 to 64 percent hydration is the sweet spot.
If you're using a whole wheat or rye blend, the dough will feel thirstier and stickier because those flours absorb more water. You may need to add an extra 10 to 20 grams of flour after the first knead. That's not a failure.
It's a sign to adjust your recipe for the flour you have.
The Fix: Small Increments, Not Big Scoops
When the dough genuinely needs adjustment, add one tablespoon of flour at a time. Let the machine knead for 30 to 60 seconds between additions. Then decide again.
A big scoop of flour will overcorrect the hydration, leaving you with a dry, crumbly crust that cracks when you stretch it.
Resist the urge to keep the dough perfectly smooth by hand. The bread maker will incorporate the flour more evenly if you let it do its job. If you've been overloading the machine, you'll notice a tough, tight dough that's hard to flatten.
That's the result of too many flour additions.
What to Do If the Dough Doesn't Rise
You've waited through the full cycle, opened the lid, and all you have is a dense, flattened ball. That's frustrating. But it's not unfixable.
Dead Yeast vs. Cold Water vs. Salt Overload
Three culprits cause most failed rises.
- Yeast expired or stored poorly: Old yeast loses potency. It might still foam slightly, but it won't lift dough.
- Tap water too hot: Heat over 120°F kills the yeast before it starts working. Conversely, cold water slows it down dramatically.
- Salt in direct contact with yeast: Salt inhibits yeast activity. If you pile them together in the same spot, that area of the dough will never rise.
The Quick Fix: Checking Yeast Freshness Before You Start
The easiest way to avoid this problem is to test the yeast in advance. Dissolve a teaspoon of sugar in a quarter cup of lukewarm water. Stir in a teaspoon of yeast.
Wait five minutes. If the mixture foams and doubles, your yeast is healthy. If it stays flat, replace it.
This simple step takes almost no effort and saves you from an hour of kneading for nothing. A little testing also lets you confirm your tap water is at the right temperature. If it feels neutral on your wrist, right around 75°F to 80°F, you're good.
Salvaging a Dense Dough Ball That Won't Budge
If the dough hasn't risen but you're not sure why, you can still rescue it. Mix a new batch of yeast into a few teaspoons of warm water and a pinch of sugar. Knead that mixture into the dough by hand, then leave it in a warm, covered bowl for another hour.
If the dough has enough life left, it will rise.
When the dough has clearly overproofed and collapsed, baking it will give you a flat, tough disc. Instead, repurpose it as a thick sheet pan pizza. Press it flat, add a generous layer of sauce and toppings, and bake.
A collapsed dough still tastes fine when it's covered with cheese.
Pros and Cons: What a Bread Maker Gets Right (and Where It Falls Short)
Every tool has trade-offs. The bread maker is no exception. Here's what it nails and where it frustrates.
The Good: Consistency, Convenience, and Clean Hands
A bread maker delivers repeatable results. The timing is fixed. The temperature is controlled.
The paddle kneads at the same speed every time.
You also get to skip the mess. No flour dust on the counter. No dough stuck under your nails.
Just toss in the ingredients, press a button, and walk away.
The Not-So-Good: Capacity Limits and the Paddle Hole Problem
Most machines handle 1 to 2 pounds of dough. That's enough for one large pizza or two medium ones. It won't feed a party.
Then there's the paddle. It leaves a hole in the bottom of the dough ball. You'll need to pinch it closed or work around it when shaping.
Minor, but worth knowing.
Step-by-Step: Pizza Dough from a Bread Maker, Start to Finish

Now let's put it all together. Follow this order every time.
Ingredients and Order: Why Wet Comes First, Yeast Goes Last
Pour in water, then olive oil. Add salt and sugar to the liquid. Add bread flour on top.
Make a small well in the flour and tuck the yeast inside, away from the salt and liquid.
Why that order? It keeps the yeast from activating too early. It also stops salt from killing the yeast on contact.
Dough Cycle vs. Measured Approach: Setting the Timeline
Pick your cycle and press start. A standard dough cycle runs 60 to 90 minutes. The pizza dough setting often finishes faster.
Use the timer? Set it so the cycle ends when you're ready to shape.
After the Beep: Removing, Resting, and Shaping Without Ruining the Dough
When the cycle ends, turn the dough onto a floured surface. Pinch the paddle hole shut. Let it rest for 10 minutes.
That rest relaxes the gluten, so the dough stretches instead of snapping back.
Shape it gently. Press from the center outward. Use your fingertips, not a rolling pin.
A rolling pin flattens the air pockets that give pizza crust its charred, blistered texture.
The Cold Ferment Option: Making Tomorrow's Dough Tonight
For better flavor, skip the countertop rise. After the machine finishes, wrap the dough ball tightly and refrigerate it for 12 to 48 hours. Cold fermentation breaks down starches and builds a deeper, more complex taste.
Bring it to room temperature for 30 minutes before shaping.
Bread Maker vs. Other Methods: Which One Fits Your Kitchen?
The bread maker is the right tool for many people, but not everyone. Here's the honest comparison.
| Method | Time | Effort | Cleaning | Result |
|---|---|---|---|---|
| Bread maker | 60-90 minutes | Minimal | Moderate | Consistent |
| Stand mixer | 20-30 minutes | Low | More parts | Excellent |
| Hand kneading | 15-20 minutes | High | Minimal | Depends on skill |
| Store-bought dough | Zero | None | None | Decent |
Who Should Skip the Bread Maker for This?
If you already own a stand mixer with a dough hook, you don't need a bread maker. The mixer makes a slightly better dough because it gives you more control over gluten development. Use the bread maker when you want hands-free convenience or when you're making dough ahead of time.
Use Cases: Thin Crust, Pan Pizza, Gluten-Free, and Whole Wheat
Your bread maker isn't limited to one style. Adjust the hydration for what you're baking.
Adjusting Hydration for Different Flour Types
Thin crust needs a firmer dough at around 58 to 60 percent hydration. Pan pizza likes a softer, wetter dough at 65 percent. Whole wheat and rye absorb more water, so bump the hydration up by 5 percent.
Making Gluten-Free Dough Without Contaminating Your Machine
Gluten-free flour blends behave differently. They don't form the same proteins. Use a dedicated gluten-free program if your machine has one.
Otherwise, choose the dough cycle and check the texture around minute five. It should look like thick batter, not a smooth ball.
Scaling the Recipe for One Large Pizza or Several Small Ones
A 500-gram batch makes one 14-inch pizza or two thin 10-inch pizzas. For multiple pizzas, it's easier to run two batches than to double a recipe in a small pan. Overfilling the bread maker leads to overflow.
Mistakes to Avoid: Real Fails (and How to Prevent Them)
You'll make mistakes once. Then you'll know better. These are the most common ones.
The Salt-Yeast Kill Zone
Piling salt directly onto yeast kills it. You'll end up with a flat, dense dough that never rises. Always separate salt and yeast in the pan.
If your machine has ever overflowed during a rise, the common failure points might surprise you.
Why Auto-Keep-Warm Ruins Your Dough
Some machines automatically shift to a keep-warm cycle after the dough program ends. That low heat starts cooking the dough. It creates a dry, cracked crust.
Turn off keep-warm. Set a timer so you're there when the cycle finishes.
The Overproofing Trap: When the Ball Collapses
Leave dough in the machine too long and it overproofs. The gluten stretches past its limit, CO2 escapes, and the ball deflates. If your dough collapses, press it flat and let it rise once more on the counter.
It'll still bake, just with a denser crumb.
Expert Tips: Better Dough in Any Machine
These small adjustments separate good dough from great dough. None of them take extra time.
Weight, Not Cups: Why Measuring by Grams Changes Everything
Flour density varies wildly with scooping. A cup of flour can weigh anywhere from 120 to 150 grams. Weighing your flour removes that guesswork.
Use a digital scale and a hydration ratio of 62 to 65 percent for the most reliable results.
Checking the Dough at the 10-Minute Mark
Set a timer when the cycle starts. At the 10-minute mark, peek inside. The dough should be forming a loose ball.
If it looks dry and shaggy, add a tablespoon of water. If it's clinging to the walls, wait another two minutes before adding flour. That single check solves most texture issues.
Using Flour Type and Water Temperature to Your Advantage
Bread flour gives a chewier crust than all-purpose. For a Neapolitan-style crust, use 00 flour. In warmer kitchens, use cooler water around 65°F to slow the rise and build flavor.
In cold weather, warm the water to 80°F. You're aiming for the dough to come out of the cycle around 78°F.
Frequently Asked Questions
Can I Use the Bread Maker to Bake the Pizza Too?
Technically, yes, but don't. The bread maker bakes at a low, slow temperature that produces a pale, thick crust. A hot oven at 500°F or a preheated steel gives you the char and crispiness pizza is known for.
Use the machine for the dough, then bake in your oven.
How Do I Get the Dough Out Without Tearing It?
Sprinkle a little flour around the edges of the pan. Gently coax the dough loose with a silicone spatula. Turn the pan upside down and let the dough fall onto a floured surface.
Pinch the paddle hole closed. Avoid pulling, which deflates the dough.
Can I Double the Recipe?
Only if your machine's pan can handle it. Most home bread makers max out at 2 pounds of dough. Doubling a standard 500-gram recipe will overflow.
Check your manual for capacity specs. When in doubt, run two separate batches.
Do I Need Bread Machine Yeast, or Will Regular Yeast Work?
Regular instant or active dry yeast works perfectly. Bread machine yeast is just a finely ground instant yeast with a lower activation temperature. Use the same amount you normally would.
Just keep it away from salt and liquid during the initial mix.
The Final Decision Guide: Make the Call Before You Press Start
A Simple Flowchart for Choosing Your Approach
Start with your machine's settings. If it has a pizza dough cycle, press that. If it only has a generic dough cycle, use that instead.
If the dough looks too stiff at the 10-minute mark, add water in small splashes. If it's too loose, wait and add flour only if needed. After the cycle, choose between room temperature proofing or a cold ferment in the fridge.
Then shape, top, and bake at maximum oven heat.
The Bottom Line: Is This the Right Tool for Your Pizza Dough?
Yes, for most home cooks. It's not the same as a wood-fired oven or a high-end stand mixer, but it's consistent, cheap, and nearly hands-off. If you want a reliable pizza dough on a weeknight with no arm workout, a bread maker is a genuinely smart choice.

Similar Posts