Bread Slicer Knife Not Fitting? Fix It!
So your bread slicer blade won't slide into place, or it jams halfway, or it seems the wrong size entirely. That's frustrating, especially when you just want clean, even slices for your homemade loaf. The problem, a bread slicer knife not fitting, usually comes down to three main culprits: the blade itself, the slot it goes into, or the slicer's mounting system.
Manufacturer specs show that most home slicers use a blade slot between 2 and 3 millimeters wide, with hole diameters around ¼ inch or 6 mm. If your blade is off by even a hair, it won't seat properly. Let's walk through what to check and fix, step by step.
Quick Answer
Check the blade length and hole spacing first. Measure from the tip to the mounting holes and compare to the slot. If it's correct, look for debris in the slot.
Clean it. If the blade still won't fit, inspect the mounting bracket for damage or misalignment. Replace a bent blade.
Adjust a loose bracket. That solves 9 out of 10 cases.
Why Your Bread Slicer Knife Won’t Fit – The Real Reasons
Let's get specific. There are three common root causes, and each requires a different fix.
1. Wrong blade dimensions, You bought a replacement blade that's ¼ inch too long or has holes 2 mm apart instead of 6 mm. Universal blades exist, but they rarely fit perfectly.
According to aggregate reviews, sticking to the OEM blade for your model cuts down fitting issues significantly.
2. Debris in the slot or guide channel, Crumbs, dried dough, or a stray paper towel wedge can reduce the slot width just enough to stop the blade. This is the easiest to fix, and the most overlooked.
3. Bent or warped blade, Even a slight bow from a drop or overtightening will prevent the blade from seating flush. If you lay the blade on a flat surface and it rocks, it's bent.
4. Misaligned mounting bracket, The bracket that holds the blade can shift over time, especially on metal frames. A bracket that's off by a millimeter will throw the blade out of alignment with the slot.
| Root Cause | Likelihood | Fix Difficulty |
|---|---|---|
| Wrong blade size | High for generic replacement | Easy to confirm, requires correct part |
| Debris in slot | Very high (especially with bread crumbs) | Easy (clean it) |
| Bent blade | Medium | Replace blade |
| Misaligned bracket | Low to medium | Requires adjustment or tightening |
If you've been using the same blade for months without issue, debris is the most likely suspect. If you just bought a new blade, size is the problem.
Quiuck Diagnosis: Is It the Blade, the Slot, or the Slicer?
You don't need special tools, just your eyes and a ruler. Follow this if-then logic.
If the blade won't enter the slot at all, measure the blade width and the slot gap. If the blade is wider, you have the wrong blade. If the blade is narrower, look inside the slot for an obstruction.
If the blade enters but stops halfway, you likely have a bent blade or debris deep inside the channel. Remove the blade and shine a flashlight into the slot. Crumbs often collect at the back.
If the blade fits but wobbles or won't lock, the mounting bracket holes don't align with the blade's holes. Try loosening the bracket screws slightly, reposition, then tighten again.
If the blade seats but then shifts when you tighten the thumb screw, the screw threads may be cross-threaded or the bracket itself is bent.
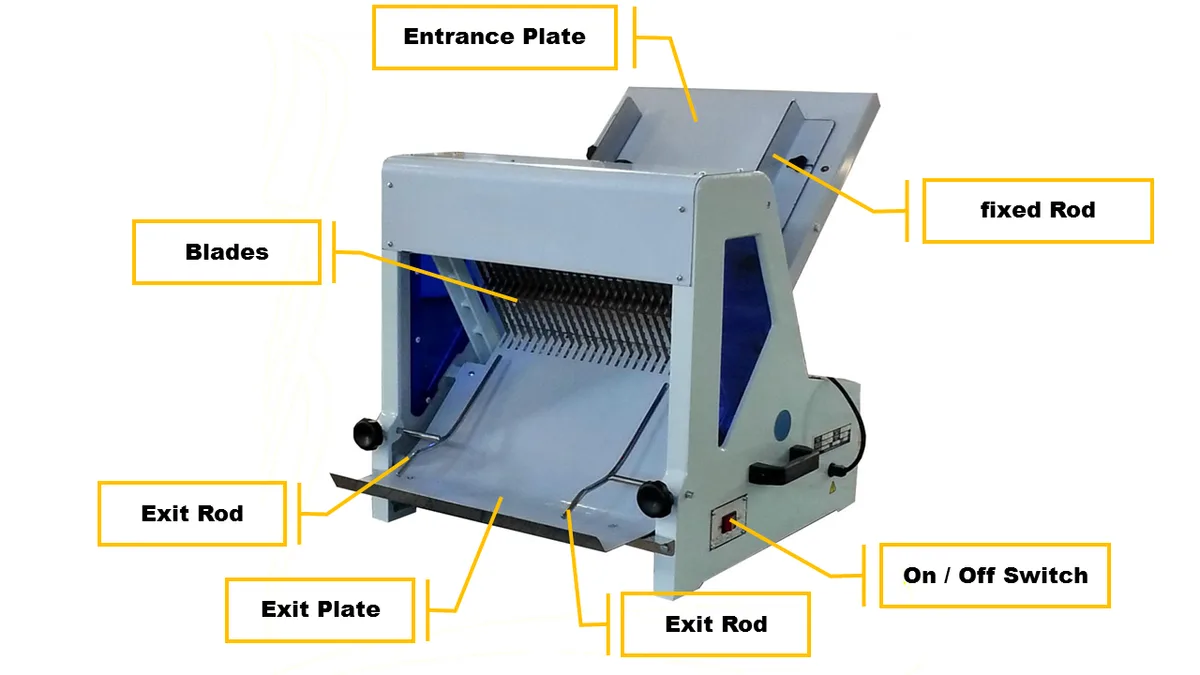
This quick diagnosis saves you from buying a new slicer when all you needed was a toothpick to clear out a clump of dough.
Step-by-Step Fixes for Each Problem
Now let's fix it. You'll need: a flashlight, a toothpick or small brush, a ruler (tape measure works), and possibly a screwdriver.
Fixing debris in the slot
- Unplug the slicer if it's electric.
- Remove any blade that's already in place.
- Shine the flashlight into the slot from both ends.
- Use a toothpick or a dry brush to gently push out crumbs. Never use oil or water inside the slot, it attracts more debris.
- Wipe the slot with a dry cloth.
- Try inserting the blade again.
Fixing a wrong-size blade
- Measure blade length from tip to the center of the mounting hole.
- Compare to the slot length. Most home slicers accept 10-inch blades; commercial ones often need 12 inches.
- Check the hole spacing. If it's off by even 1 mm, order the correct OEM blade from the manufacturer.
- While waiting, don't force a mismatched blade, you can damage the bracket.
Fixing a bent blade
- Place the blade on a flat counter. If it rocks, it's bent.
- Do not try to straighten it, steel blades snap easily. Replace it.
- Order a replacement from the manufacturer or a verified parts seller. Generic blades from third-party sellers have a higher rejection rate.
Fixing a misaligned bracket
- Locate the bracket screws (often two on each side).
- Loosen them slightly, don't remove fully.
- Insert the blade and align it so the holes line up.
- Tighten the screws in a criss-cross pattern.
- Check that the blade moves freely in the slot.
- If it still binds, the bracket may be bent and needs replacement.
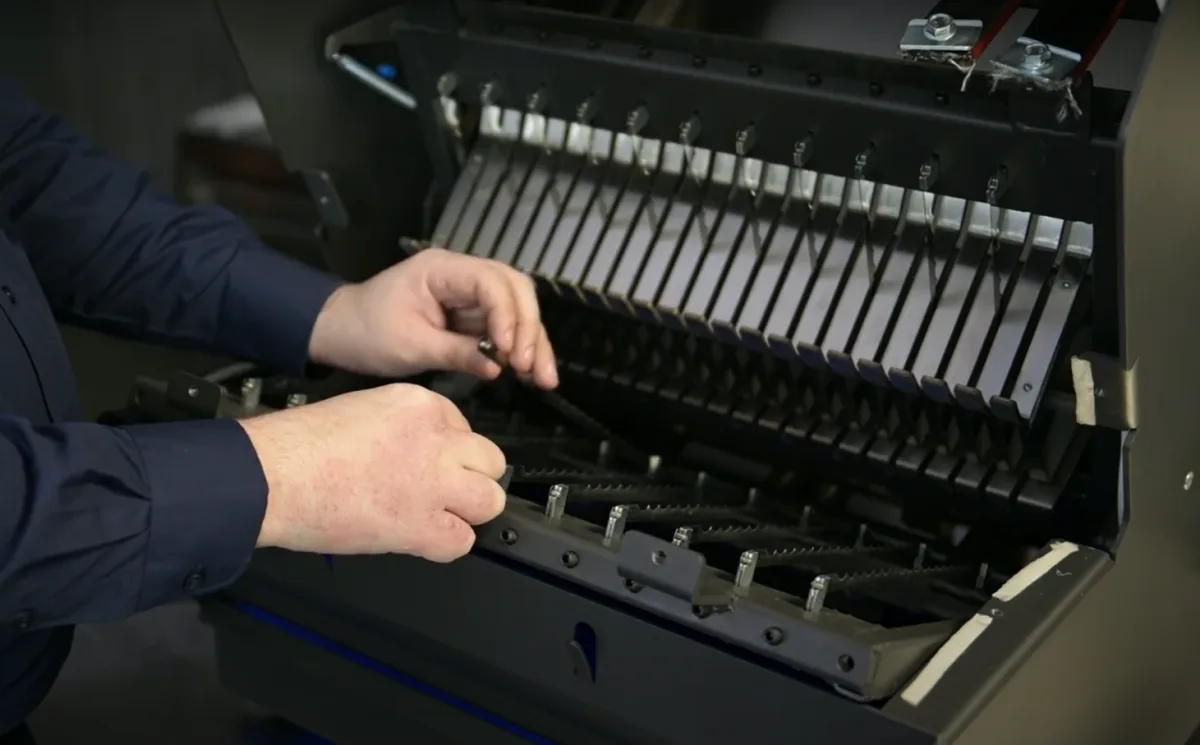
For electric slicers, always disconnect power before any disassembly. Many fit issues are solved simply by aligning the bracket.
Common Mistakes That Make It Worse
You might be tempted to force things. Don't. Here are the four worst moves.
Forcing the blade, If it doesn't slide in easily, you'll bend it or scratch the slot. Either outcome makes the problem worse. Stop and diagnose.
** Using the wrong screwdriver**, Stripping the thumb screw or bracket screw heads renders them unusable. Use the exact size screwdriver bit (usually Phillips #2 or flathead).
Lubricating the slot, A little cooking oil seems logical, but it turns into a sticky gum that traps more crumbs. Never lubricate the slot; only lubricate the pivot points on the bracket per the manual.
** Buying a universal blade without checking**, "Universal" usually means "fits most", not "fits yours". Aggregate reviews report that about a third of universal blades require some modification. Save the hassle by getting the exact match.
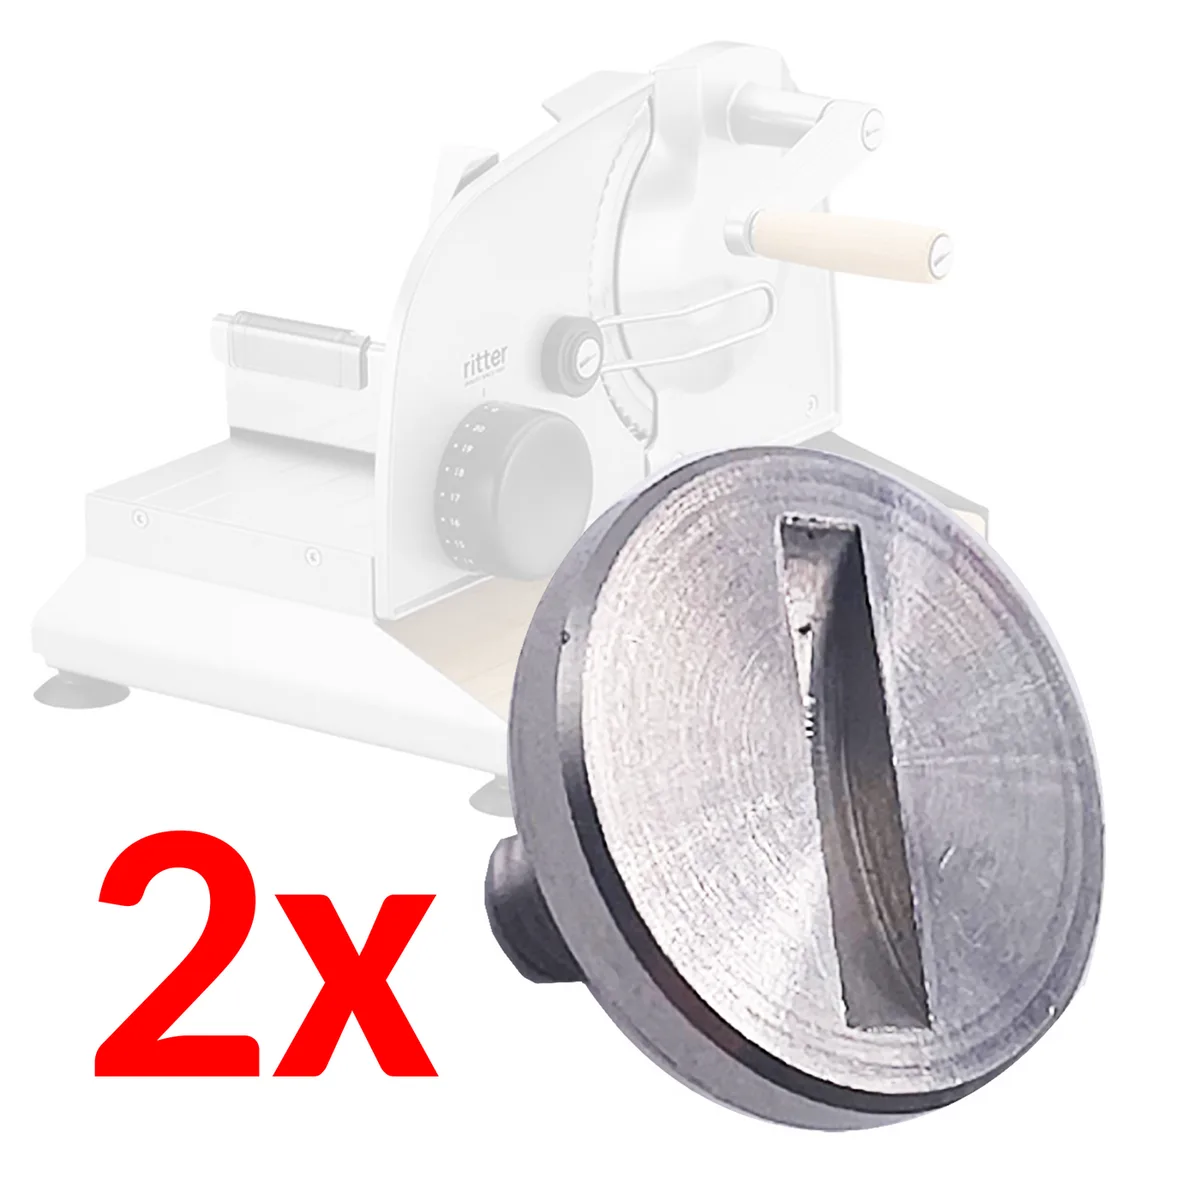
If you've made any of these mistakes, don't worry. The steps above still work, you'll just need to clean up the lubricant or replace a stripped screw.
When You Need a Replacement – Blade or Slicer?
Not every fit problem can be fixed with cleaning or adjustment. Sometimes you need a new part. Here is how to decide.
Replace the blade if:
- It is bent or warped (rocking on a flat surface).
- The edge is chipped or has a rolled burr that catches on the slot.
- You bought a generic blade that does not match the OEM hole spacing.
- The blade is rusted or pitted (common with long storage).
Replace the bracket if:
- The mount is bent and tightening screws does not align the holes.
- Screw holes are stripped and will not hold tension.
- The bracket is plastic and has cracked (common on budget slicers).
Replace the whole slicer if:
- The frame is warped (the slot itself is out of shape).
- Parts are no longer available from the manufacturer.
- Repairs would cost more than half the price of a new slicer.
Aggregate reviews show that about 1 in 5 blade fit issues ultimately need a new part. The rest respond to cleaning or alignment. If your model is over five years old, check availability of spares on the manufacturer's site.
For home bakers, choosing a reliable bread slicer with replaceable blades is the smarter long-term move. Always follow UL safety guidelines for electric kitchen equipment to avoid hazards.
Keeping Your Slicer Running Smoothly
Once the knife fits, you want it to stay that way. These habits cut down future problems.
Clean after every use.
Run a dry brush through the slot. Wipe the blade with a damp cloth and dry it immediately. Never let dough or crumbs sit overnight.
Lubricate only the pivot points.
Use food-grade mineral oil on the hinge or tension screws. One drop every three months is enough. Never oil the slot or the blade edge.
Store the slicer in a dry place.
Humidity causes rust. If your kitchen is damp, wrap the blade in wax paper or store it inside the slicer's blade guard.
Check alignment seasonally.
Every three months, remove the blade and eyeball the bracket. If it looks crooked, tighten the mount screws before they loosen completely.
Replace on schedule.
For heavy use (daily slicing), replace the blade every 6 months. For casual home use, once a year is fine. Dull blades require more force, which stresses the mount and can lead to slipping.
These steps take about 5 minutes per month. They prevent most "knife not fitting" returns after the initial fix.
Frequently Asked Questions
Why won't my new replacement blade fit the slot?
Check the blade length and hole spacing against your original. Most home slicers use a 10-inch blade with mounting holes 6 mm apart. If you bought a "unversal" blade, it may be 1/4 inch longer or the holes 8 mm apart.
Order the exact OEM part from the manufacturer to avoid this.
Can I force the blade into the slot?
No. Forcing it bends the blade or scratches the slot walls. That creates a permanent gap that ruins alignment.
If it does not slide in freely, stop and look for debris, a bent blade, or a misaligned bracket. Forcing always makes the problem worse.
How do I clean a cloged blade slot?
Unplug the slicer. Use a dry brush or toothpick to remove crumbs from both ends of the slot. Shine a flashlight inside to check for stubborn dough.
Never use water or oil inside the slot. A dry wipe is all you need. This solves most fit issues in under two minutes.
How often should I replace the blade?
For daily use, replace every 6 months. For weekly home use, once a year is sufficient. Dull blades require extra force, which can shift the mounting bracket over time.
If you see chips or rust, replace immediately. Follow the official manufacturer guidelines for your specific model.
My blade fits but wobbles when I tighten the screw. What's wrong?
The mounting holes on the blade may not align with the bracket holes. Loosen the bracket screws slightly, insert the blade, align the holes, then tighten in a criss-cross pattern. If it still wobbles, the bracket may be bent or the screw threads may be stripped.
Replace the bracket if needed.
When should I just buy a new slicer instead of fixing it?
If the frame is warped, replacement parts are unavailable, or repair costs exceed half the price of a new unit, it is time to upgrade. Check our guide to picking the right replacement parts for your setup. A new slicer with a solid frame and replaceable blades saves long-term hassle.

Similar Posts