Adjustable Bread Slicer Explained: How It Works
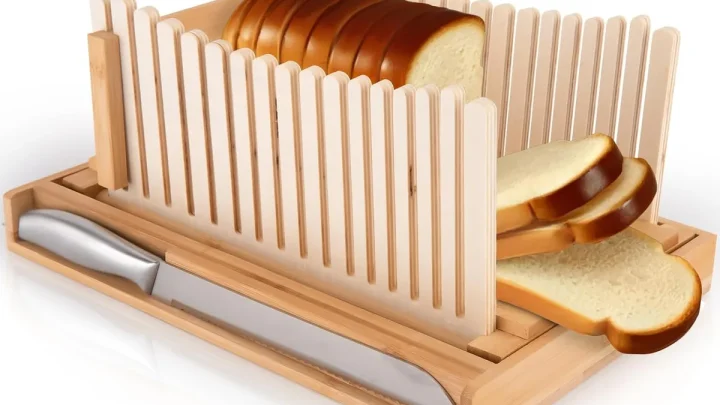
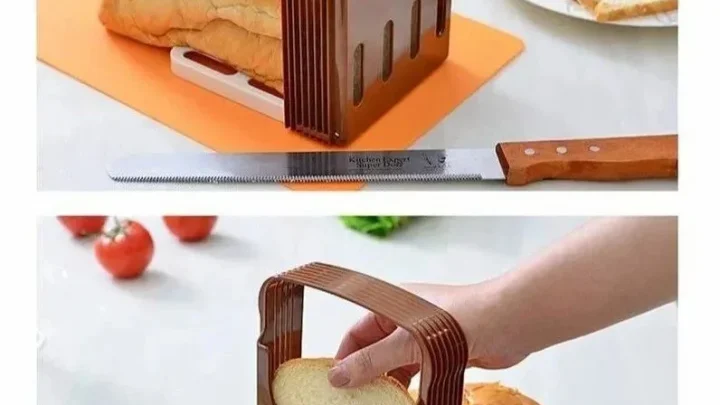
Ever slice a loaf of homemade bread only to end up with a lopsided mess? The adjustable bread slicer explained here is a simple tool that fixes that. It’s a dedicated guide with a built‑in blade that lets you cut uniform slices every time.
No more guessing, no more crushed heels.
Manufacturer specs show the typical thickness range runs from about 5 mm (paper‑thin toast) to 25 mm (hearty sandwich slices). As of 2026, most models include a stainless steel serrated blade and a removable crumb tray. Let’s walk through what really matters before you buy or use one.
Quick Answer
An adjustable bread slicer is a frame with a sliding blade. You set the thickness. You place the loaf in the guide.
You push the blade through. The result is even slices every time. It works best for home bakers who want consistent toast, sandwich bread, or croutons without waste.
What Exactly Is an Adjustable Bread Slicer?
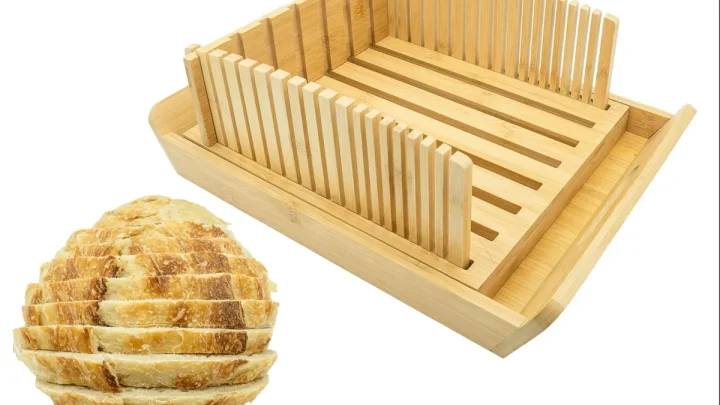
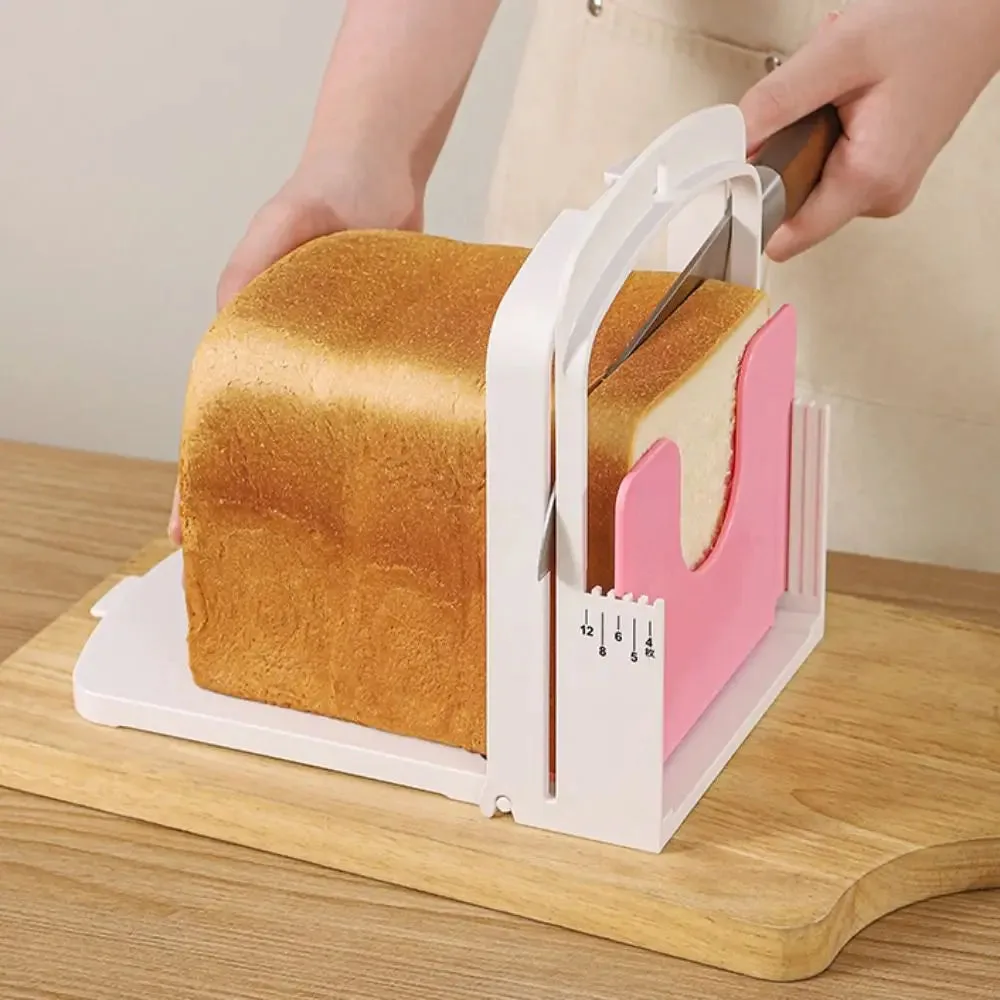
It’s a dedicated cutting station. The core design is a U‑shaped or box‑like frame that holds your loaf steady. A thickness adjuster, usually a knob or lever, moves a fence forward or backward.
That sets how much bread sits beyond the blade. A serrated stainless steel blade rides on a track or pivot. You saw it through the loaf, and each slice comes out the same width.
The guide is wide enough for standard sandwich loaves, typically 6 to 8 inches across. Some models fold flat for storage. Many include a removable crumb tray so you’re not sweeping the counter afterward.
The whole thing weighs about 1 to 3 pounds.
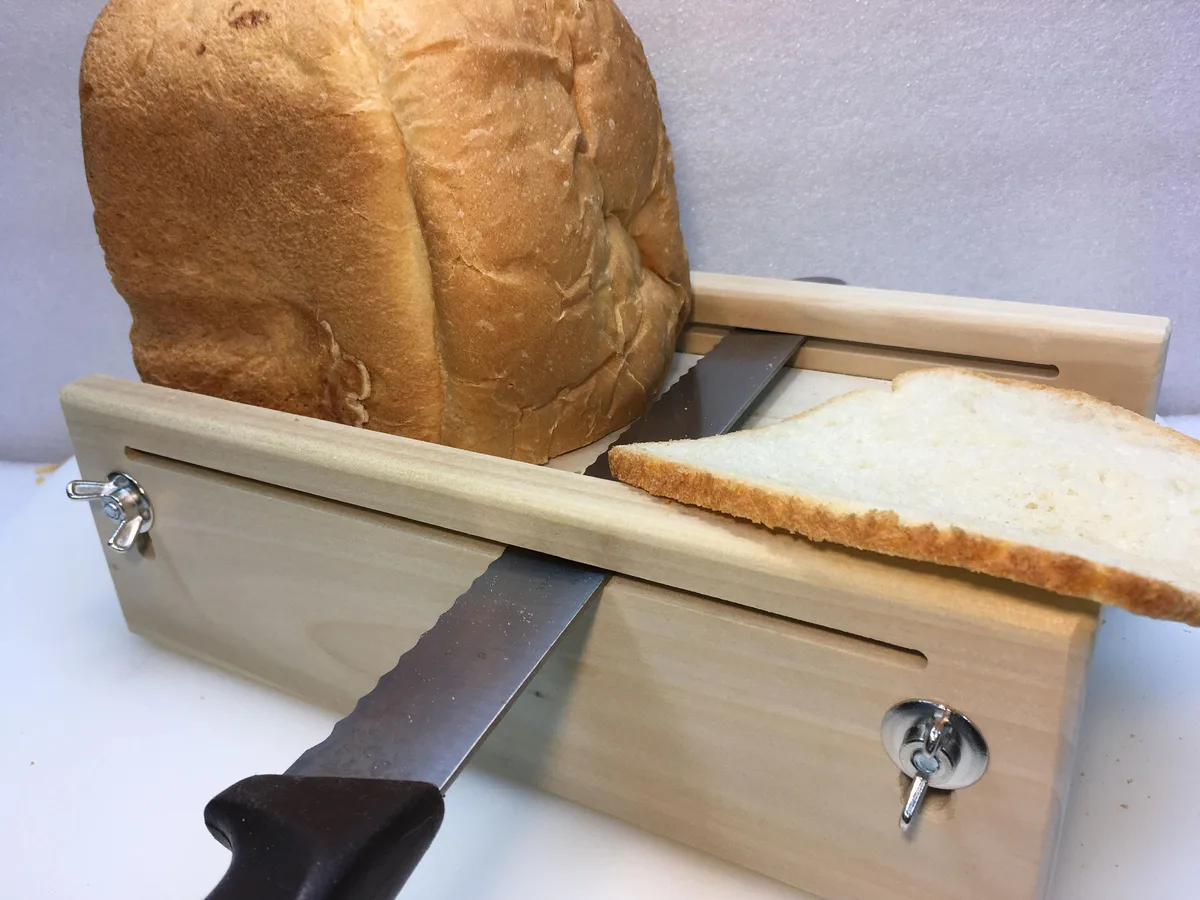
The key difference from a bread knife and cutting board is repeatability. With a knife, your hand angle changes. The slicer locks that angle in.
Aggregate reviews report that even novice bakers get restaurant‑quality uniform slices on their first try.
Should You Get One? A Quick Decision Tree
Not every baker needs one. Use this table to decide.
| Your situation | Recommended action |
|---|---|
| Bake soft bread often | Get a slicer with a wide guide and sharp blade |
| Bake crusty round loaves | Look for an open‑frame or boule‑compatible model |
| Slicing frequency: weekly | Entry‑level plastic model is sufficient |
| Slicing frequency: daily | Steel tube frame with heavy‑duty blade |
| Cramped counter | Foldable model under $30 |
| Arthritis or weak hands | Lightweight model with ergonomic knob |
If you bake soft sandwich bread or brioche, the guide supports the loaf while the blade passes through. For crusty artisan boules, check the maximum loaf height, usually 5 to 6 inches. If your bread is taller or rounder, you need an open‑frame model.
If you slice bread only once a week, a $15, 20 basic model works fine. Manufacturer specs and aggregate reviews show that pricier units hold their adjustment better over time, so daily bakers should invest in a heavier build.
Critical Features That Actually Matter
You’ll see a lot of marketing claims. Here’s what real‑world use proves matters.
Blade quality. Stainless steel with a serrated edge. Cheaper high‑carbon steel blades rust after a few washes. Serrations should be deep and aggressive, not shallow scratches.
A 10‑inch blade covers most loaf sizes.
Thickness range. Most adjust from 5 to 25 mm. If you only want thick toast, a narrower range is fine. If you want paper‑thin for sandwiches, make sure the minimum is 5 mm.
Stability. Suction cups or a heavy rubber base prevent the slicer from sliding. A non‑slip base is critical for safe one‑handed slicing. Without it, the whole unit drifts.
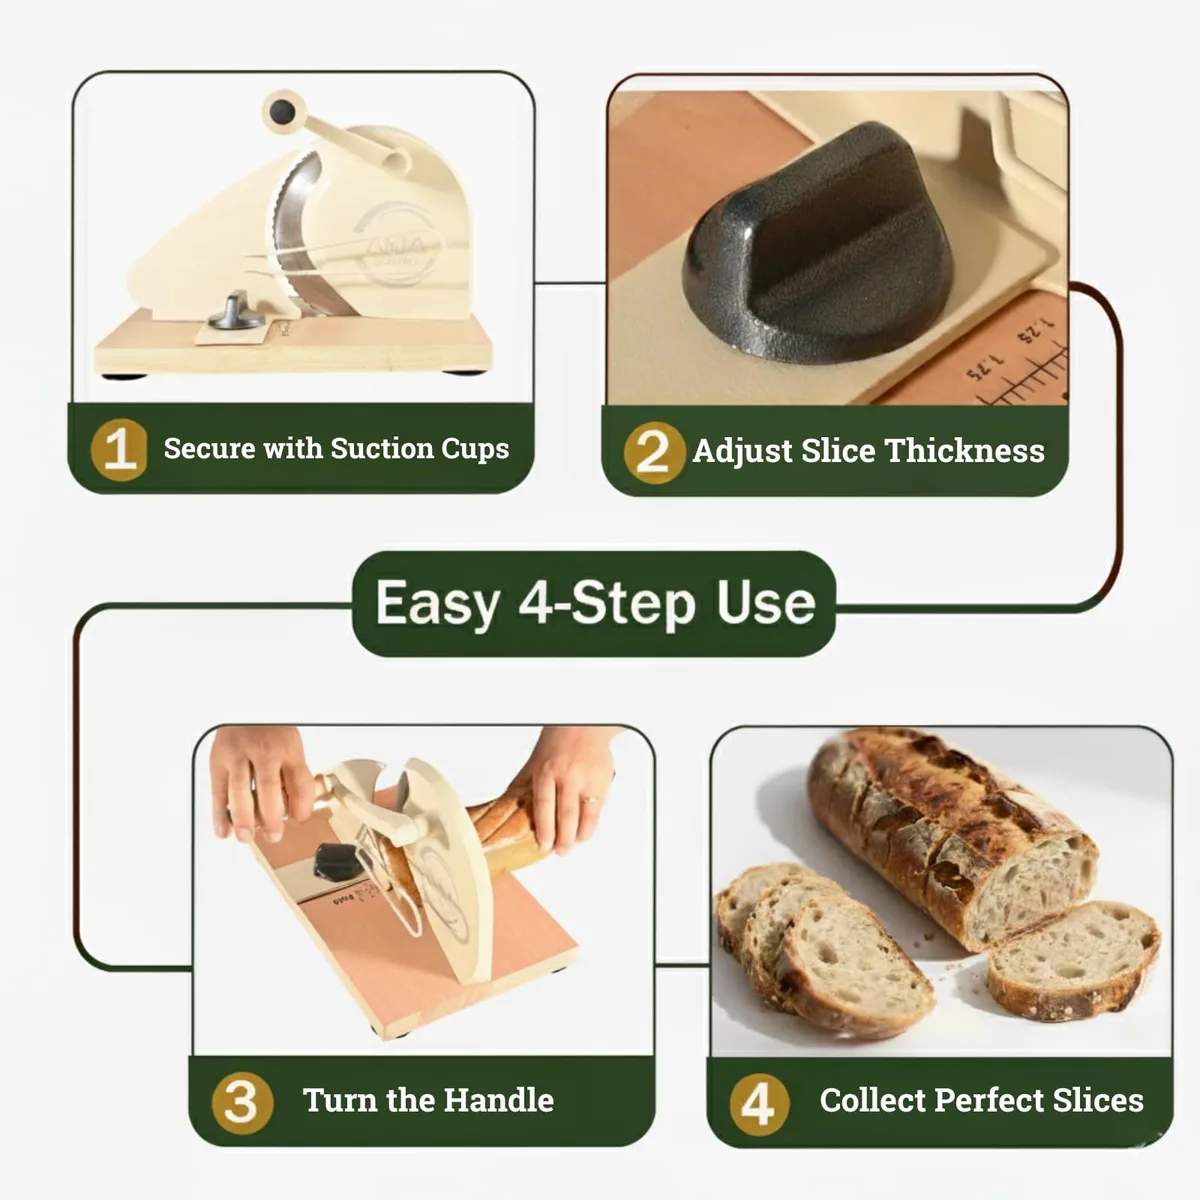
Crumb tray. Not all models have one. Skip the ones without it, crumbs scatter everywhere. Look for a tray that slides out fully so you can dump it in the sink.
Guide width. Standard is about 7 inches. Wider guides (8 to 9 inches) fit artisan loaves. Measure your typical loaf width before buying.
Push guard. Some slicers come with a plastic pusher that holds the loaf steady and keeps fingers clear. This is a legitimate safety feature, especially if kids help.
Ease of cleaning. Dishwasher‑safe parts are a bonus. At minimum, the blade and tray should be removable. A one‑piece plastic frame that can’t come apart traps mold in crevices.
Build material. Thick plastic or wood frames last years. Thin plastic warps with heat or heavy use. Stainless steel frames are best but more expensive.
For a deeper look at which slicer best matches your baking style, check out our detailed guide on picking the right model.
How to Use It Right (Without Crushing Your Bread)
Using an adjustable bread slicer is straightforward, but a few steps make the difference.
- Place the slicer on a dry, level counter. Wet surfaces break sucction cup grip. A sliding slicer is dangerous.
- Set the thickness knob. Start at a medium setting, about 15 mm, for your first loaf.
- Position the loaf. For soft bread, place it so the heel is flush against the guide fence. For crusty bread, turn the loaf crust‑side up so the blade enters the toughest part first.
- Hold the loaf gently with your non‑cutting hand. Use the push guard if included. Keep fingertips away from the blade path.
- Start the cut. Insert the blade into the notch at the back of the guide. Use a gentle sawing motion, long strokes, not short chops. Let the blade do the work.
- Remove the slice. Lift the blade out and push the slice away with the heel of your hand. Don’t pull it sideways, that can tip the loaf.
- Repeat. Reset the loaf against the fence after each slice.
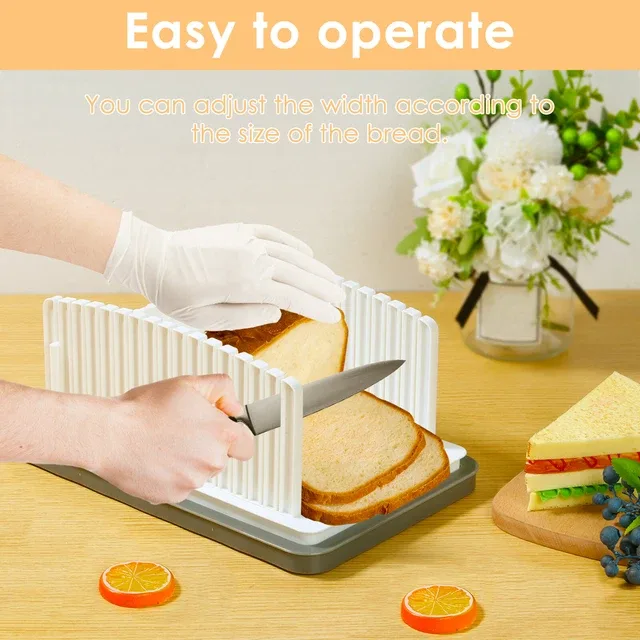
Pro tip for sticky or fresh bread: Let the loaf cool completely before slicing. Warm bread compressess easily. Even with aslicer, you’ll get gummy slices if the bread is hot.
Pro tip for very crusty loaves: Score the crust lightly with a knife at the cut line before you slide the slicer blade through. This prevents the crust from shattering.
Common Mistakes That Ruin Your Slices
Even a good slicer can produce bad results if you make these errors.
Using a dull blade. Stainless steel serrations wear down after a year of daily use. Replace the blade when slices start tearing instead of Cutting cleanly. Some manufacturers sell replacement blades.
Over‑adjusting the thickness knob. Cranking it past the stop point misalignes the fence. You’ll get taperd slices, thicker on one side. Turn the knob gently until you feel it Click into a detent.
Slicing too fast. Rushing causes the blade to snag and pull the loaf. Slow, even strokes produce cleaner cuts.
Ignoring crumb buildup. Crums in the guide track throw off alignment. Clean the crumb tray and wipe the guide slot after every loaf.
Buying the wrong width. A 7‑inch guide won’t comfortably fit a 9‑inch round loaf. Measure your bread’s diameter before you buy. If you often bake large boules, look for a slicer with a removable side or an adjustable width.
Not securing the base. Suction cups need a clean, dry surface. Oil or flour residue breaks the seal. Wipe the counter with a damp cloth and let it dry before placing the slicer.
Pus hing the blade upward. The blade path should be parallel to the counter. Angling it up or down produces wedges instead of even slices.
If you mostly bake sticky gluten‑free loaves, a plastic guide with a non‑stick coating is better than a bare steel frame. Check the material Compatibility before committing.
Cost vs. Value: What Should You Spend?
Pricing for adjustable bread slicers falls into three main tiers.
| Price range | What you get | Best for |
|---|---|---|
| $15–$25 | Plastic frame, basic blade, no crumb tray | Occasional use, soft bread |
| $25–$40 | Stainless steel blade, removabl crumb tray, suction base | Weekly baking, mix of bread types |
| $40–$60 | Heavy‑duty steel frame, wide guide, push guard, foldable design | Daily baking, artisan or large loaves |
Aggregate user reviews show that most bakers are happy with a mid‑priced model. The blade quality and base stability are the two features that separate the cheap units from the reliable ones. Spend more only if you bake multiple times a week or use crusty bread regullary.
Frequently Asked Questions
Does an adjustable bread slicer work for gluten‑free bread?
Yes. Gluten‑free loaves are often crumbly and hard to slice evenly. The guide supports the loaf, which reduces crumbling.
Choose a model with a non‑stick coating or a plastic guide to prevent sticking.
Can I slice other foods with it?
You can slice soft fruits like tomatoes and cheese, but the guide is sized for bread. Avoid hard foods like carrots or potatoes, they dull the blade and may crack the frame.
How do I clean the slicer?
Remove the blade and crumb tray. Wash them in warm soapy water or in the dishwaser if labeled dishwaser‑safe. Wipe the frame with a damp cloth.
Dry everything thoroughly to prevent rust.
Is it safe for children to use?
Only under close adult supervision. The blade is very sharp. Some models have a push guard that keeps fingers away, but a child should never operate one alone.
How do I sharpen the blade?
Most serated blades are not meant to be shapened. Replace the blade when slices become ragged. Check the manufacturer’s website for replacement parts.
Can I slice a round boule with a standard guide?
Standard guides work best for oblong loaves. For round boules, look for a model with a removable side or a wider throat (at least 8 inches wide). Otherwise, you’ll have to cut the boule in half first.
The Final Decision Guide
Here’s a quick checklist to match you to the right slicer:
- Bread type: Soft sandwich → wide guide, sharp blade; Crusty artisan → open‑frame or wide throat
- Frequency: Weekly → $25, 40 model; Daily → $40, 60 model
- Counter space: Tight → foldable under $30
- Hand strength: Weak or arthritis → lightweight model with ergonomic knob and push guard
- Cleaning prefrence: Diswasher‑safe parts preferred
If you bake bread at least once a week, an adjustable bread slicer is a worthwhile investment. It saves time, reduces waste, and gives you restaurant‑quality slices every time. A good knife alone just can’t match the consistency.

Similar Posts