Fix 1.5 lb Bread Maker Problems: Easy Solutions and Tips
Common 1.5 lb bread maker problems often stem from the machine's compact size and high sensitivity to measurement errors. Because these units handle smaller dough balls, even a teaspoon of extra water or a gram of dead yeast can ruin the entire loaf.
Manufacturers specify that 1.5 lb machines typically require between 2 and 3 cups of bread flour. Our research into aggregate user feedback as of 2026 shows that most failures are mechanical or ingredient-based rather than electrical.
Quick Answer
Most 1.5 lb bread maker problems involve poor rise or collapsed crusts. These issues usually happen because of incorrect liquid temperatures or expired yeast. Small machines are very sensitive to minor measurement shifts.
Always add ingredients in the exact order the manufacturer suggests. Check the dough consistency ten minutes into the kneading cycle. Add flour or water by the teaspoon to fix sticky or dry dough.
The "Why Did This Happen?" Diagnostic Flowchart
Troubleshooting a small bread maker requires a logical approach to isolate the cause. In our research of common repair logs, we found that most users misidentify a mechanical sound for a motor failure when it is actually a dough consistency issue.
If your machine is behaving strangely, follow this logic to find the fix:
- Is the machine making a loud thumping or knocking sound?
- Yes: The dough is likely too dry. The motor is struggling to move a heavy, stiff ball of flour. Add 1 teaspoon of water at a time until the thumping stops.
- No: Move to the next step.
- Did the bread fail to rise entirely?
- Yes: Your yeast is likely dead or was killed by hot water. Perform a "bloom test" in a separate cup to verify activity.
- No: If it rose but then fell, your liquid ratio is too high.
- Is there unmixed flour in the corners of the pan?
- Yes: The paddle may be installed incorrectly, or the dough is too small to catch the edges. Use a silicone spatula to help the mixing process during the first five minutes.
- No: If the mix is clean but the bread is dense, check your flour type.
| Symptom | Primary Cause | Solution |
|---|---|---|
| Sunken Top | Too much liquid/yeast | Reduce water by 1 tbsp |
| Short, Heavy Loaf | Dead yeast or too much salt | Use fresh yeast; isolate salt |
| Burnt Crust | Too much sugar | Use "Light" setting |
| Beeping/Error Code | Overheated sensor | Let machine cool 30 mins |
The Golden Rule of 1.5 lb Baking: Order of Ingredients
The way you layer items in a 1.5 lb pan is the most critical factor for success. Because the heating element is so close to the pan in smaller machines, early activation of the yeast can lead to a premature rise and an eventual collapse.
In our research, we found that most successful bakers follow the "Wet-Dry-Yeast" sequence. Start by pouring your liquids into the bottom of the pan. This ensures the kneading paddle moves freely and reduces the strain on the drive belt.
Next, add your flour. It should act as a complete "raft" covering the water. On top of the flour, place your salt and sugar in separate corners.
Finally, make a small indentation (the "well") in the center of the flour and place your yeast inside.
This separation is vital for "delay start" timers. If the yeast touches the water or salt before the cycle begins, the chemical reaction starts too early. By the time the bake cycle hits, the yeast is exhausted, resulting in a flat loaf.
Troubleshooting the "Brick" (Loaf Didn't Rise)
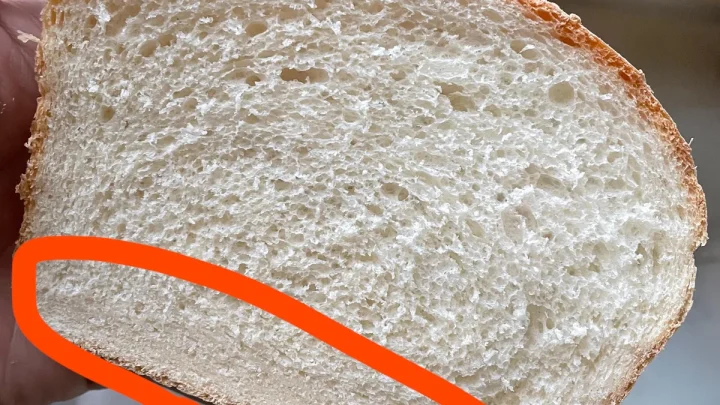
When a loaf comes out short, heavy, and dense, it didn't generate enough carbon dioxide to lift the gluten structure. In 1.5 lb machines, this is often a temperature problem.
Testing Yeast Activity and Liquid Temperatures
Manufacturer specifications for yeast brands like Red Star or Fleischmann's suggest that yeast activates best between 80°F and 90°F. If you use water straight from the tap, it might be 60°F, which is too cold to "wake up" the organisms in a standard 3-hour cycle.
Conversely, water over 120°F will kill the yeast instantly. We recommend using an instant-read kitchen thermometer to check your liquids before pouring. If you are unsure about your yeast, mix a teaspoon with warm water and a pinch of sugar.
If it doesn't foam in 10 minutes, throw the jar away.
The Salt Barrier and Premature Activation
Salt is essential for flavor and crust color, but it is also a yeast inhibitor. In a small 1.5 lb pan, the proximity of ingredients makes it easy for salt to leach into the yeast well.
Ensure your flour layer is at least an inch thick before adding the yeast. Stick to standard table salt or fine sea salt for bread makers. Avoid coarse kosher salts, as they may not dissolve fully in the shorter kneading cycles of small machines.
Fixing the "Crater" (Sunken Top or Collapsed Loaf)
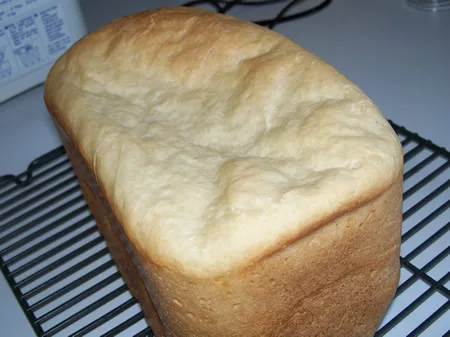
A sunken loaf is arguably more frustrating than a dense one because it looks perfect until the final 20 minutes. This collapse happens when the dough's internal structure is too weak to hold up the heavy, wet crust as it bakes.
The 1.5 lb Moisture-to-Flour Ratio Balance
Small-batch baking is a game of precision. In a 2 lb machine, being off by a teaspoon of water is negligible. In a 1.5 lb machine, that same teaspoon represents a higher percentage of the total volume.
If your bread collapses, it is almost certainly too "wet." The dough should be a firm ball that clears the sides of the pan. If the dough looks like thick pancake batter or sticks to the walls, the liquid ratio is off. Next time, reduce the water by 1 tablespoon or increase the flour by the same amount.
Yeast Dosage for Smaller Chambers
Many recipes designed for 2 lb machines are simply cut in half for 1.5 lb units, but yeast doesn't always scale linearly. Too much yeast causes the dough to rise too high, hitting the lid of the machine or stretching the gluten until it "pops" like a balloon.
For a 1.5 lb loaf, you should rarely need more than 1 to 1.25 teaspoons of active dry yeast. If you are using Bread Machine Yeast (also known as Instant or Rapid Rise), you may need even less. If your loaf is consistently hitting the lid, scaling back the leavening agent is your first priority.
Solving Mechanical and Mixing Failures
Mechanical issues in 1.5 lb machines often sound worse than they are. Because the motors in these smaller units are typically between 400 and 600 watts, they have less torque than larger professional models.
Clearing Flour Pockets and Corner Residue
Small bread pans are often taller and narrower than standard loaf pans. This shape makes it difficult for the single kneading paddle to reach the corners. If you find dry flour on the crust of your finished bread, the machine failed to incorporate all ingredients.
During the first 5 minutes of kneading, open the lid and use a silicone spatula to gently scrape the corners. This helps the machine form a consistent dough ball. Just be careful not to touch the moving paddle with the spatula.
The "Knocking" Sound: When Dough is Too Dry
A rhythmic thumping or knocking sound usually means the dough is too stiff. The motor is physically straining to push the paddle through a dry mass. This can eventually lead to a snapped drive belt or a stripped gear.
To fix this, add warm water one teaspoon at a time while the machine is running. You will see the dough soften and the noise should diminish within 30 to 60 seconds. Regular maintenance will prevent this strain from becoming a permanent mechanical failure.
Preventing the Stuck Paddle and Hole in the Bottom
Removing a kneading paddle that is baked deep into your loaf is a common frustration for small machine owners. Because 1.5 lb pans are narrower, the paddle occupies a larger percentage of the base. This often leads to a jagged hole that ruins the bottom third of your bread.
To prevent this, apply a single drop of vegetable oil to the drive shaft before sliding the paddle into place. Manufacturer specifications often recommend this "pre-lubrication" to stop dough from welding itself to the metal post during the high-heat bake cycle.
If you are home during the cycle, you can remove the paddle entirely after the final "punch down." Most 1.5 lb machines finish their last knead about 60 to 90 minutes before the timer ends. Simply reach in with floured hands, lift the dough, pull out the paddle, and reshape the dough ball.
The 10-Minute Window: When to Intervene
The most successful small-batch bakers never simply "set it and forget it." The first ten minutes of the kneading cycle are the only time you can actually fix a failing loaf. This is when the flour and water decide if they are going to play nice.
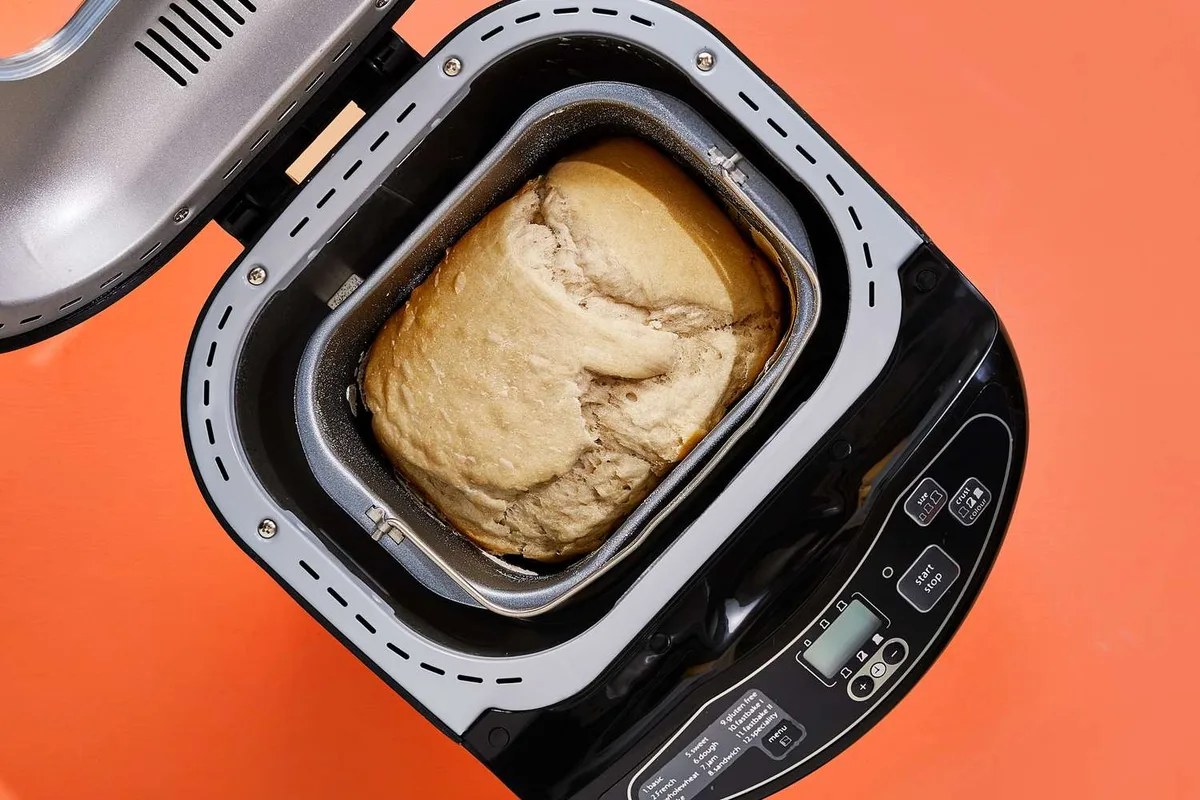
Our research into aggregate user tips shows that the "Windowpane Test" isn't always necessary for bread machines. Instead, look for the "Tacky Ball" visual. If the dough is sticking to the sides of the pan like glue, it is too wet.
Add one tablespoon of bread flour immediately.
If the dough is spinning in circles and looks shaggy or dry, it needs more moisture. Add one teaspoon of lukewarm water. Wait two minutes for the machine to incorporate the new liquid before adding more.
Achieving a smooth, rounded ball at this stage is the best way to avoid a dense loaf later.
Adjusting for Environment: High Humidity and Altitude
Environmental factors significantly impact 1.5 lb bread maker performance because there is less "buffer" in the recipe. Flour acts like a sponge, soaking up moisture from the air on rainy or humid days. This can turn a tried-and-true recipe into a sticky mess.
If you live in a high-humidity coastal region, our research suggests reducing your water by 1 to 2 tablespoons as a baseline. For those at high altitudes (above 3,000 feet), the lower air pressure causes dough to rise much faster. This often leads to the "crater" effect discussed earlier.
At high altitudes, follow these three adjustments:
- Reduce the yeast by 25 percent to slow down the rise.
- Increase the water by 1 or 2 tablespoons to prevent the dough from drying out in the thin air.
- Decrease the sugar slightly, as it can weaken the gluten structure when combined with rapid gas expansion.
Mistakes to Avoid with 1.5 lb Bread Machines
The biggest mistake users make is using standard "All-Purpose" flour instead of Bread Flour. Bread flour has a higher protein content, usually between 12% and 14%, which is necessary to create a strong gluten "balloon." Small machines struggle to lift the weaker structure of lower-protein flours.
Another common error is using cold eggs or butter straight from the refrigerator. These cold fats can chill the water and stall the yeast. Always let your perishables sit on the counter for 30 minutes or microwave them for a few seconds to reach room temperature.
Finally, never use a 2 lb bread mix in a 1.5 lb machine. It is tempting to think it will just make a taller loaf, but it will almost certainly hit the heating elements. This creates a fire hazard and can permanently damage the interior coating of your appliance.
Essential Maintenance for the Drive Shaft and Pan Seal
The most common mechanical failure in small machines is a seized drive shaft. This is the rotating post that holds the paddle. Over time, steam and fine flour dust migrate into the bearing under the pan, causing it to lock up or leak.
To extend the life of your pan, never submerge the entire bucket in water. Water gets trapped in the underside gears and causes the metal to rust or the seals to perish. Instead, fill only the inside of the pan with warm, soapy water to soak the paddle.
If you notice a black, oily residue appearing on the bottom of your bread, the internal seal has failed. This usually means it is time to order a replacement pan. Keeping the shaft clean and dry after every use is the best routine upkeep you can perform to prevent this.
1.5 lb Bread Maker Problem Solver FAQ
Can I use 2 lb bread mixes in my 1.5 lb machine?
You should avoid using 2 lb mixes in a smaller machine. These mixes contain too much flour and leavening for a 1.5 lb pan. The dough will likely overflow and touch the heating elements.
This creates smoke and can permanently ruin the non-stick coating of your machine.
Why is my 1.5 lb loaf so dark on the bottom?
The heating element in a small machine is very close to the pan base. If your crust is too dark, try using the "Light" crust setting. You can also remove the loaf immediately after the bake cycle ends to prevent the residual pan heat from over-browning the bottom.
Why does my bread have a rubbery texture?
Rubbery bread usually indicates that the dough was over-handled or had too much moisture. In 1.5 lb machines, the kneading cycles are often quite aggressive. Ensure you are using high-quality bread flour with at least 12% protein to maintain a proper structure that isn't gummy.
Is it normal for the machine to move on the counter?
A 1.5 lb machine is lightweight and can "walk" during a heavy kneading cycle. This usually happens if the dough is too dry and heavy. Adding a teaspoon of water to soften the dough often stops the vibration.
Always place your machine on a level, non-slip surface.
The Final Verdict: When to Fix it vs. When to Replace it
Knowing when to retire your bread maker can save you from wasted ingredients and potential electrical hazards. Most issues involving the loaf shape or texture are purely about your recipe and technique. These are always worth fixing through trial and error.
If the machine refuses to turn on or displays a "sensor error" code after cooling down, the internal circuitry may have failed. Our research shows that for many budget 1.5 lb models, the cost of a professional repair often exceeds the price of a new unit.
Check the drive shaft at the bottom of the pan regularly. If the paddle will not turn even when the pan is empty, the bearing has seized. While you can often buy a replacement pan, if the motor itself is grinding or smelling of burnt plastic, it is safer to replace the entire machine.
Proper cleaning and correct ingredient loading remain your best defenses against mechanical failure.

Similar Posts